When you’re creating thousands of new photos a year, it’s important to have a digital workflow.
Last week we shared some tips for new photographers, which covered basic shooting habits for getting the most from your DSLR. Today we are going to talk about optimised digital workflow. With the advent of digital photography, people are shooting more photos than ever before, doing more with their images, and retouching their personal work at home or in the studio. Therefore it’s a good idea to have some sort of workflow that eases the process from capture to final print.
Shoot RAW instead of JPG
By default, your new DSLR is most likely set to capture JPG images. JPG has come a long way since it’s inception as a lossy format, offering print-ready quality without any visible compression artifacts at the higher quality settings. These days you can export your final image in JPG instead of the massive lossless TIFF files without sacrificing print quality. To get to your final image, however, can sometimes require a lot of editing or photoshopping, and that’s where the uncompressed RAW format comes in. Starting off with a compressed file means your quality will cascade downwards throughout your workflow, as each time the image gets saved, it gets compressed again and again. Therefore, it’s best to start with the best quality files* you can get from your camera (RAW), work on the files, and then export it as JPG for print.
Another reason to shoot RAW, is that you have much better control over the exposure and the white balance of the image. You can push or pull a good RAW file up to 4 stops in some cases, which allows you to correct any mistakes during your shoot (although this shouldn’t encourage lazy shooting habits) and alternative visions for the original capture (such as a dark and moody feel for an image that was originally correctly exposed). If you’re just starting out, you might think that this is not something that you’re bothered with and that JPG will be fine to save some hard disk space, but you never know when you need to revisit a project in the future, and then you’ll appreciate having RAW files to work with. In any case, it is relatively inexpensive to have a couple of gigabytes of free hard disk space these days, and adding more hard drives as you require them is not a major cost.
*You can also set your colour space to Adobe RGB for an expanded colour gamut, but this is more important for advanced photographers and retouchers. Refer to your camera’s instruction manual for more information.
Import your files into organised folders
That pretty much sums it up. When you copy the files from you camera to your hard disk, make sure that you use some form of organised folder structure. “Organised” means different things to different people, but it’s generally a good idea to structure the folders by year, month and date. Other people work better by structuring it via projects or clients. I personally import a shoot into a folder titled according to the date and project name, something like: “2011-06-01 Shoot Title”, and place all these folders into one RAWs folder. So, all my shoots are in one large folder sorted by dates and title, which makes it incredibly easy to find a specific project. You’ll find what works for you through trial and error.
On a related note, a memory card reader is a recommended investment. Card readers are optimised for much faster transfer speeds than the USB port on your camera, so copying across a full 8 gigabyte memory card doesn’t take up as much of your valuable time.
Find a good photo browser/RAW convertor
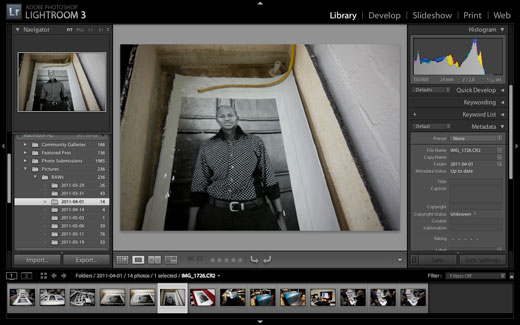
Hopefully you’re going to be shooting RAW from now on, if you don’t already, so you’ll need a good application to “develop” your files. If you own a Mac, you already have a fairly decent RAW converter installed – iPhoto. Apple’s photo browsing software can handle most RAW files (each camera has it’s own specific sub-format) but has a few downsides – I personally don’t like the way iPhoto imports your folders into its library, it makes it very difficult to find the original files again. Other free options include Google’s Picassa and manufacturer’s software: Hasselblad’s Phocus (which also works with your DSLR), Nikon’s Capture NX and Canon’s Digital Photo Professional. If you have Adobe Photoshop, you also have a plugin called Camera RAW, which is one of the best convertors, and it also works from Adobe Bridge, the image browsing software. Adobe Lightroom combines the functionality of Camera RAW and Bridge into one application. What do I use? I have found Adobe Lightroom suits my workflow the best. I use Lightroom to import my images, pick the best from a shoot, develop them and export to .PSDs for retouching in Photoshop. Once again, it’s best to try out the different software packages to find which works best for you.
That’s it for today. I would like to write some basic tips for Adobe Photoshop, but I don’t have an indication of how many of you guys would find this handy. Let me know in the comments if you use Photoshop, and if you’d like some tips.
Next week I’ll write about printing. A lot of people have stopped printing their personal images, confining them to their hard disks and the internet sharing services, but there’s something special about viewing your own work in printed form. Look out for the article!
Image credits (creative commons):
Sushi Sashimi Bridge by Pedro Moura Pinheiro
Future living in filing cabinets by _foam





Thanks for the write up makes me want to shoot in RAW more often (if not always).
I think for the holiday snaps I will still use JPG for now though.
Would love to hear your take on adobe products 🙂
Thanks for the article – I also battle with the iPhoto storage system, but have never made use of Lightroom before. I’ve been playing around with Photoshop for years but would love some tips!