Cape Town-based web developer and photographer Carlo van Wyk had a look at the Profoto B2, here is his in-depth review.
Review and photographs by Carlo van Wyk, a Cape Town-based web developer and photographer. The Profoto equipment is available through Orms Direct.
Read the full Profoto B2 review here.
In 2013, Profoto released the Profoto B1. It was a radical concept: a battery powered, portable monolight with TTL functionality that can push out 500 w/s.
Now, 2 years later, Profoto released the Profoto B2 250 Air TTL as part of their OCF (Off Camera Flash) line of equipment.
It’s a small, compact, portable battery pack and head system. Weighing in at around 3.5 lbs for the generator and one head vs 6.6 lbs for the Profoto B1, the B2 is significantly lighter than the Profoto B1, while being smaller and more compact to travel with.
| Profoto B2 Key Specifications | |
| Max Energy | 250 Ws |
| Energy range | 9 f-stops |
| Battery Capacity | 215 Full Power Flashes |
| Radio Sync & Control | Built in AirTTL |
| TTL | Yes. |
| High Speed Sync | Yes. Energy Range 7-10 for both Canon and Nikon |
| Profoto B2 vs Profoto B1 | ||
| Profoto B2 250 | Profoto B1 500 | |
| Max Energy | 250 Ws | 500 Ws |
| Energy range | 9 f-stops | 9 f-stops |
| Battery Capacity | 215 Full Power Flashes | 220 Full Power Flashes |
| Radio Sync & Control | Built in AirTTL | Built in AirTTL |
| TTL | Yes. | Yes. |
| High Speed Sync | Yes. Energy Range 7-10 for both Canon and Nikon | Yes. Energy Range 7-10 for Canon, Energy Range 8-10 for Nikon |
Profoto B2 : Asymmetrical Power
The Profoto B2 supports full asymmetrical power control over both heads. This means you can split the power over two heads using any ratio you choose. For example you can set head 1 to a power level of 3 and head 2 to a power level of 7 or any other combination you choose.
The Review
Profoto sent me a B2 250 Air TTL Location Kit to review for a few days. As I had 2 fashion shoots lined up with models, this was the ideal way to test the Profoto B2 in a real world scenario. For my upcoming shoots, I decided to leave my usual equipment at home which consists of a Profoto B1 and a Profoto D1, and use the Profoto B2 exclusively. A risky decision at the time, but I really wanted to perform a real world test and see what the Profoto B2 is capable of.
The Equipment
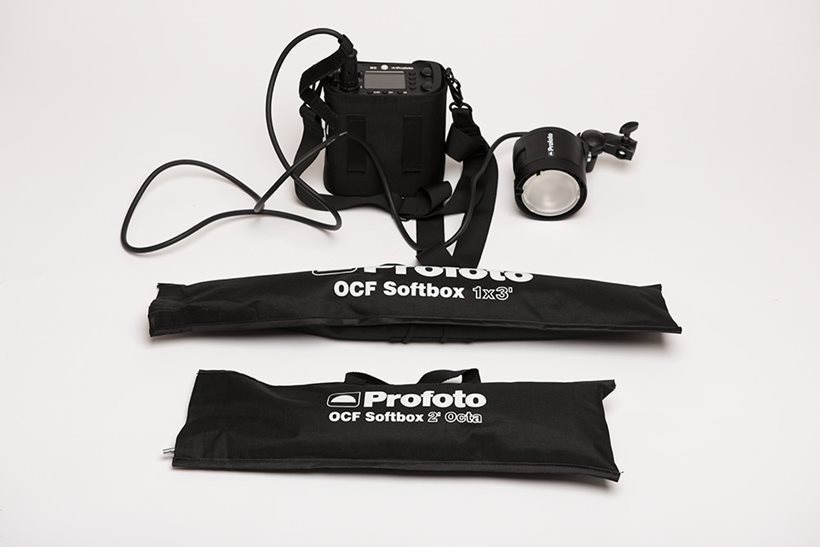
I was sent a Profoto B2 250 Air TTL Location Kit, which consists of the B2 250 AirTTL Battery Pack, 2 batteries, 2 flash heads, a battery charger and a location bag. In addition to this I also had a 2’ Profoto OCF Softbox with a grid and OCF Speedring, a 1 x 3’ Profoto OCF Softbox with grid and OCF Speedring, a Profoto OCF snoot, Profoto OCF Barndoors, a Profoto OCF Grid Kit and a small Profoto Deep Silver Umbrella to test.
I used the following of my own equipment for the test:
Profoto TTL-N Air Remote
Nikon D810
Nikon 24-70mm f2.8
Nikon 100mm Macro
Westcott Rapid Box XL (3′) for Profoto
Profoto Magnum Reflector
White Profoto Softlight Reflector (Beauty Dish) with grid.
¼ stop Diffusion
C-Stand
Sekonic Light Meter
Sandbags
Profoto B2 with OCF Snoot and OCF Grid Kit
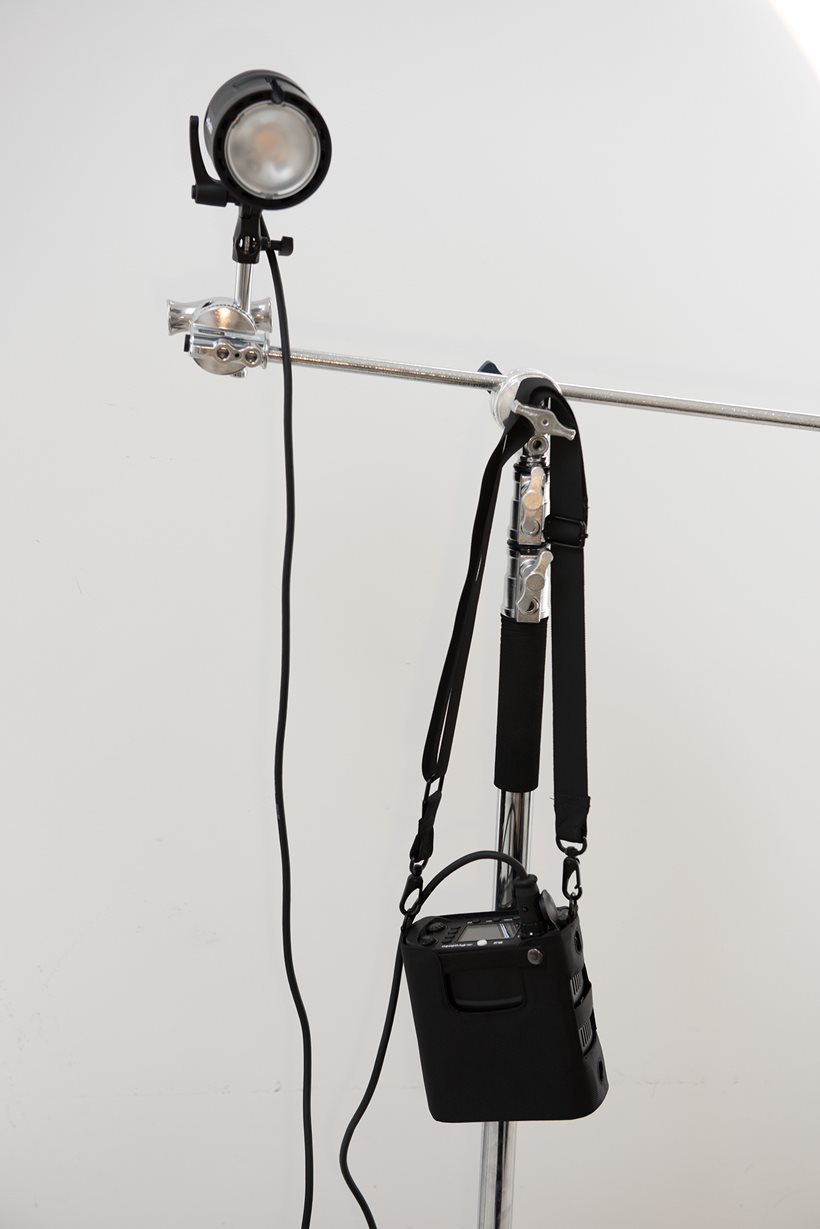
Shown above: Profoto B2 Battery Pack with B2 Head, Profoto OCF Grid Kit and Profoto OCF Snoot.
Profoto B2 and Extra Battery
Shown above : Profoto B2 Battery Pack with extra Battery
Profoto B2 and Profoto B1
Shown above : Profoto B2 with a B2 Head next to a Profoto B1
Profoto B2 Test #1 : A Fashion Shoot in the Studio
For the first fashion shoot, I shot with a new face at a model agency. This was also the first time this particular model has done a fashion shoot.
With new models, it’s always a good idea to start shooting outside as a way of relaxing the model and easing her into the shoot – people naturally feel more comfortable outside, whereas a studio can come across as a clinical environment. However, on this particular day we had very misty conditions and it wasn’t possible to shoot outside as the mist would have caused havoc on the model’s hair, so I made the best of the situation and spent a couple of hours in the studio.
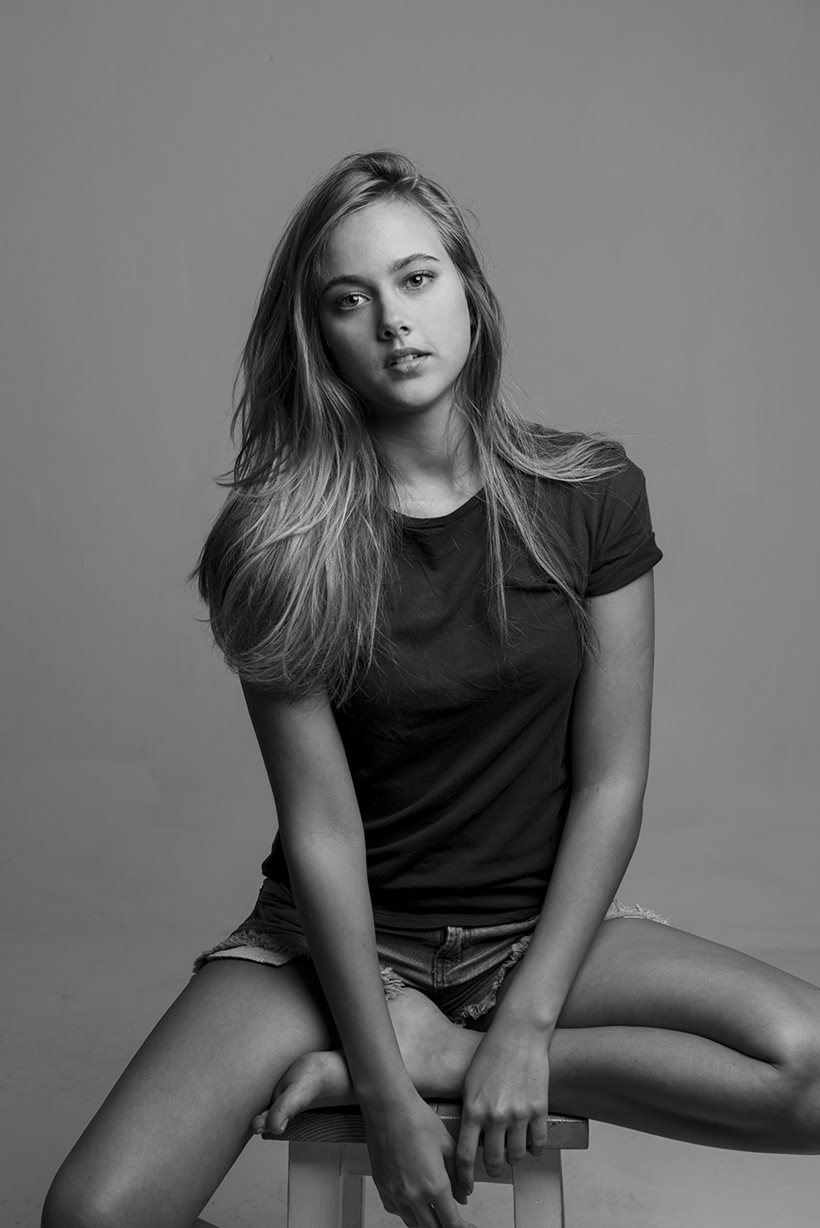
I played around with the Profoto 2’ OCF Octa and the Profoto 1×3’ OCF Softbox, but ended up using my Westcott 3’ RapidBox Octa as I wanted a slightly larger Octa to get a softer, more even light. The 3’ Octa is my favourite light modifier – it’s big enough to provide soft light, yet small enough to provide enough contrast.
The one reservation I had with the Profoto B2, was weather it would have enough light to shoot at smaller apertures such as F8 and F11 in the studio, especially when using a diffused light source such as a Octabox. It turned out to be a non issue as I was comfortably shooting at F8 and F11 all day long.
Profoto B2 : A Fashion Shoot
For this picture, I used 1 Profoto B2 head and a 3′ Octa to the side of the model.
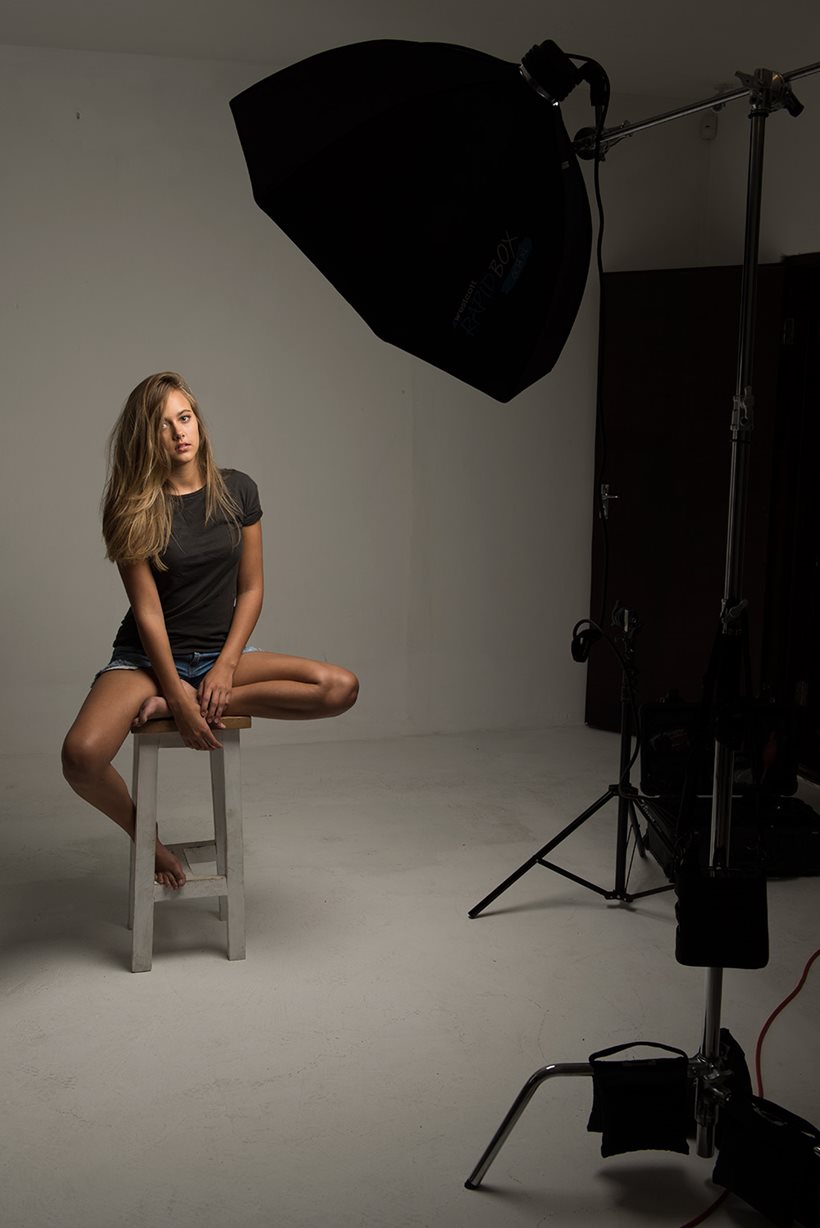
Lighting Setup
Here you can see the setup I used for the above picture.
I used a Profoto B2 with one head, mounted on a C-stand (sand-bagged).
The light was positioned above and slightly to the right of the model.
I was only using 1 head with the Profoto B2. As the Profoto B2 is a full asymmetrical system, power is distributed between heads if you use more than 1 head. You could distribute 200 w/s to the first head and 50 w/s to the second, but you could end up in a scenario where one or both of the heads have inadequate power. This did not affect my setup as I shoot with 1 head 80% of the time.
I’m pretty sure that the purpose of the Profoto B2 is not for studio work, but I felt it was an important test as those spending this amount of money might not have money to buy a dedicated studio strobe or a more powerful Profoto B1, and it’s good to know that the Profoto B2 is powerful enough to work comfortably in the studio.
Profoto B2: Fashion Shoot
For this picture, I asked the model to sit down against a white wall for a more high key look.
I used one Profoto B2 head and a 3′ Octa Box.
Lighting Setup
Here you can see the lighting setup I used for the second picture.
I lowered the light a little bit and moved the light a little bit further away.
I shot for about 2 hours, and took about 240 pictures before the first battery ran out. With each different look or positioning of the light I also fired off a series of flashes to take light meter readings, so the actual number of flash pops I got out of the first battery are estimated to be closer to 300, which is pretty good in my opinion.
It’s worth noting that a handy feature of the Profoto B2 is the ability to trickle charge while you’re shooting. It isn’t strictly trickle charging, as the unit will only charge between shots, but it’s still a nice feature as it means you can shoot in a studio environment without really worrying about batteries running out.
Profoto claims a recharge time of about 45 minutes to 60 minutes for the Profoto B2, and in my experience this is correct.
Profoto B2 Test #2 : A Fashion Shoot Outdoors
For my second test, I chose to do an outdoor fashion shoot with a model I have worked with before.
For this shoot, I wanted to test the Profoto B2 in an outdoor situation.
I chose to use the Profoto Magnum Reflector, as the Magnum reflector not only adds at least a full stop of power to any profoto head, but it’s a sturdy and lightweight modifier.
For the first shot, I hung a bright orange backdrop on a backdrop stand and asked the model to pose with a can of Coca-Cola as I felt the choice of color would make for a vibrant combination. For my light setup, I used one Profoto B2 head with a Magnum Reflector and added a ¼ stop diffusion material to the Magnum Reflector as I wanted to soften the light a little bit. This is one of my favourite ways of using the Magnum Reflector – punchy, contrast light but slightly softer. I positioned the light slightly to the right and above the model, pointing down at her to get a more even illumination across her body.
Profoto B2 : The Coca Cola Shot
For this picture, I placed the model in front of a colorful backdrop and had her pose with a can of Coca Cola to compliment the colour of the backdrop.
The Coca Cola Shot: Behind the Scenes
I used a Profoto B2 with a Magnum Reflector and a piece of 1/4 stop diffusion material that I taped to the Magnum Reflector. This is one of my favourite ways of using the Magnum Reflector as it gives a softer light that is still punchy.
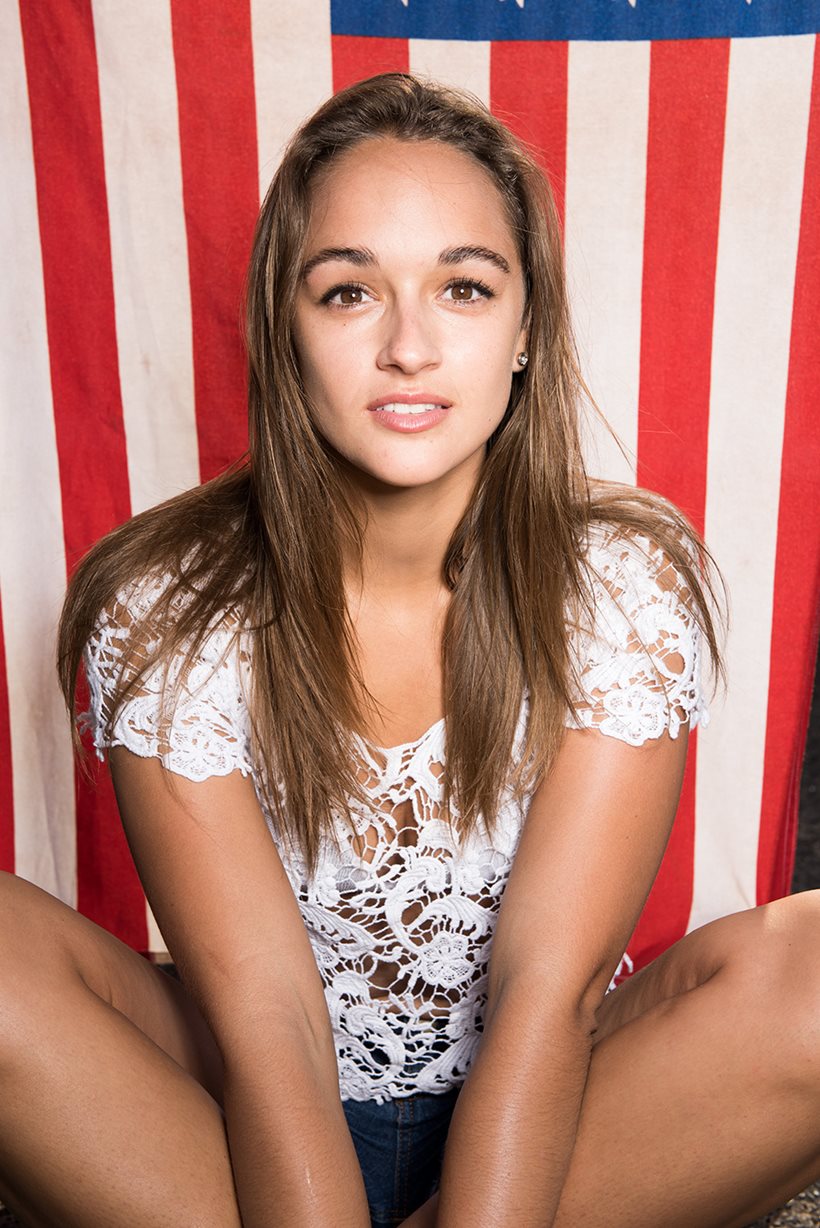
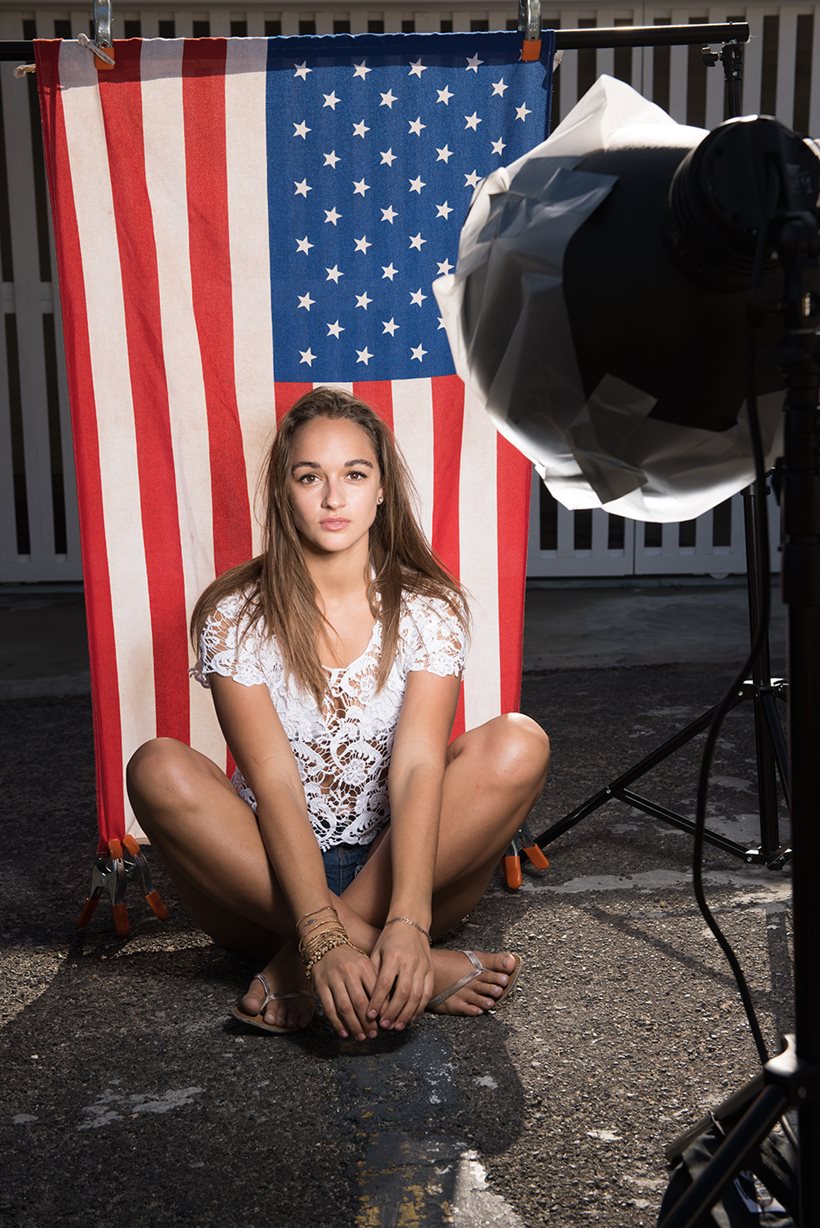
For the second shot, I chose to hang an American flag off the backdrop. The light setup stayed the same : a single Profoto B2 Head with a Magnum Reflector, diffused with a ¼ stop diffusion material. For the positioning of the light, I simply lowered the light stand a bit.
Profoto B2: The American Flag Shot
In this picture, I asked the model to sit down and changed the backdrop to an American flag.
Behind the Scenes: The American Flag Shot
For this picture, I chose to keep the Profoto B2 single head with a Magnum Reflector and a 1/4 stop diffusion, but I lowered the light a bit to match the model’s height sitting down.
For the third shot, I wanted to test the Profoto B2’s High Speed Sync (HSS).
I asked the model to sit down with her back towards the sun, so that I could shoot into the sun. I used a Magnum Reflector without any diffusion , positioned slightly to the right of me and slightly higher than the model’s head.
I shot at ISO 64 and the exposure was f2.8 and 1/1000 of a second.
For this shot, the Profoto B2 had plenty of power left as it was only using power setting 8.
Profoto B2: The American Flag Shot
In this picture, I asked the model to sit down and changed the backdrop to an American flag.
Behind the Scenes: The American Flag Shot
For this picture, I chose to keep the Profoto B2 single head with a Magnum Reflector and a 1/4 stop diffusion, but I lowered the light a bit to match the model’s height sitting down.
For the fourth shot, I wanted to do a full length shot in bright sunlight to see if the Profoto B2 had enough power to overpower the sun. There has been some debate on the internet over if the Profoto B2 has enough power to overpower the sun, so I wanted to see what I can come up with.
Luckily I had a few tricks up my sleeve that I could use to my advantage to overpower the sun, even with as little as 250 w/s and a full length portrait.
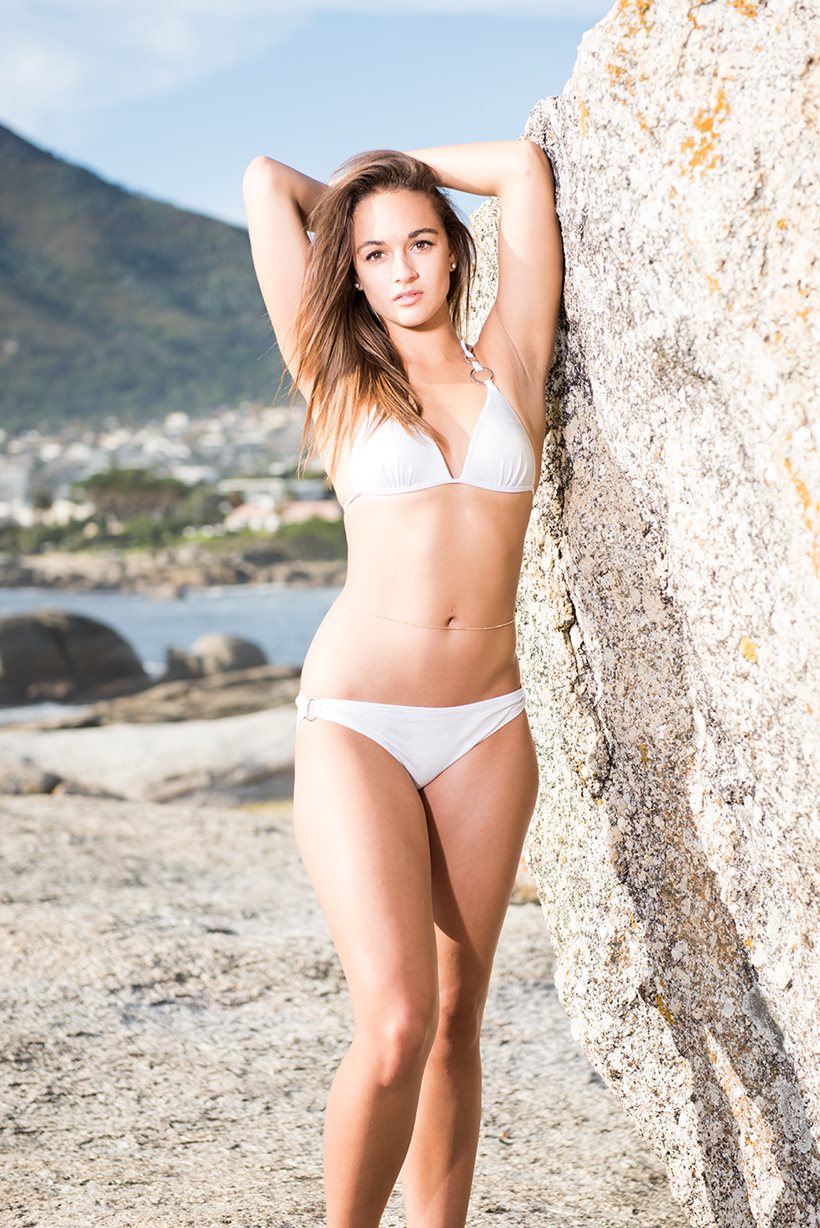
Overpowering the Sun Using the Profoto B2 (Full Length Bikini Shot)
In this picture, I mounted a Magnum Reflector to the Profoto B2 head to comfortably overpower the sun on a full length shot. I used the High Speed Sync (HSS) functionality of the Profoto B2 via TTL. The power setting on the battery pack read 8.9, leaving at least another full stop of power to use.
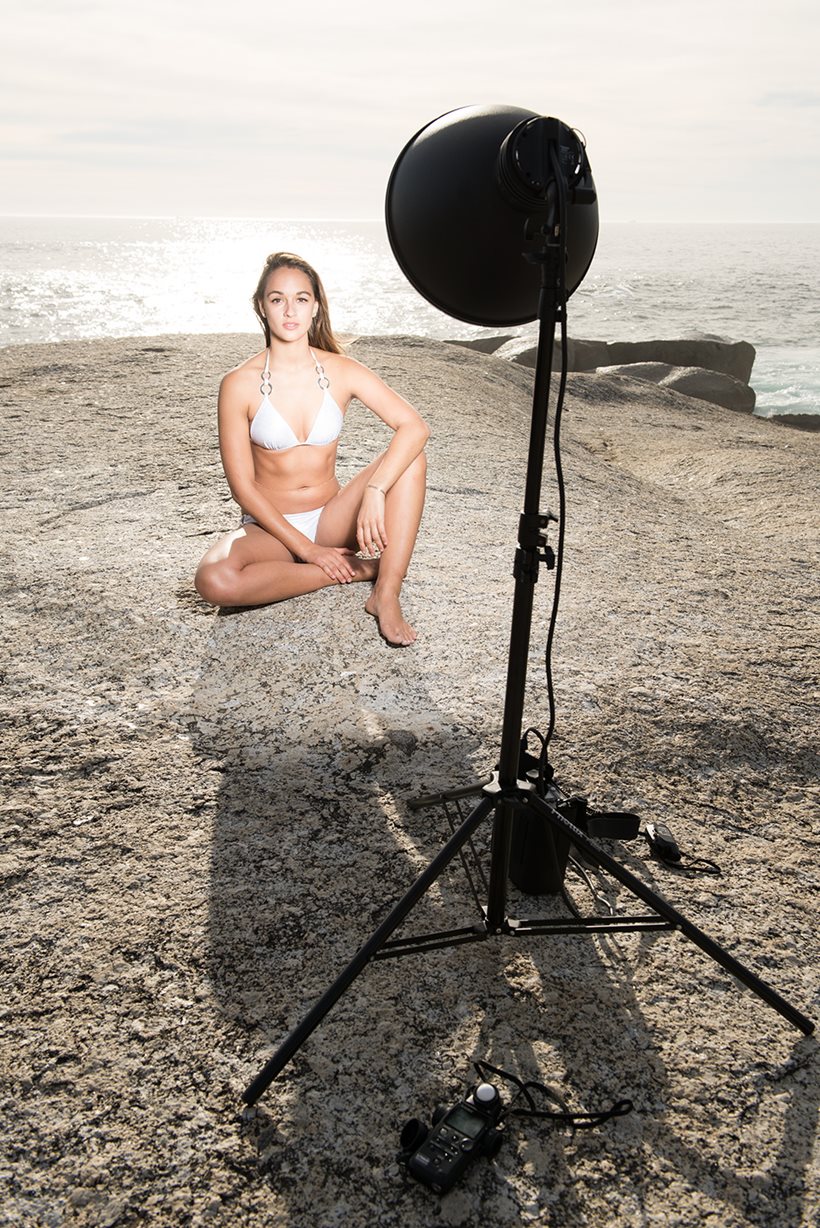
Behind the Scenes: Overpowering the Sun on a Profoto B2 for a Full Length Bikini Shot
Here you can see the setup I used to overpower the sun for the full length shot. The Sun was coming from the model’s left, with the Magnum Reflector positioned at a 45 degree angle in front of the model.
Here’s a few tips to overpower the sun with a Profoto B2 or any other strobe or speedlite, regardless of the power output:
The first thing to be aware of, is that not all modifiers are equal. Some modifiers take away power, whilst others actually magnify the power of your strobe. A softbox with an inner baffle and an outer diffusion layer will take away about a stop of light. This means that a softbox on a Profoto B1 500 w/s strobe will reduce it to the equivalent power of a Profoto B2 250 w/s, and a softbox on a Profoto B2 will reduce the power from 250 w/s to 125 w/s.
On the other hand, a reflector like the Profoto Magnum Reflector will double the power of the Profoto B2 to 500 w/s. Another thing to be mindful of is the inverse square law, or the rate at which light diminishes over distance. In simple terms, try and keep your light as close as possible to your subject in order to maximise the available power in your strobe.
By using the Magnum Reflector, and by being aware of the inverse square law, I was able to comfortably overpower the sun, even while using High Speed Sync.
Profoto B2 Test #3 : A Portrait of My Son
After my fashion shoots were done, I still had some time on my hands, and I wanted to test the Profoto B2 with my Profoto Beauty Dish to see if I can create a low key portrait by overpowering the ambient light in a room.
Profoto B2: A Low Key Portrait using a Beauty Dish and Grid
Here, I used a white Beauty Dish with a grid mounted on a Profoto B2 head. I brought it in close and slightly behind my son to create a dramatic low key portrait. The Profoto B2 comfortably overpowered the ambient light in the room here.
For this shot, I used a White Profoto Beauty Dish with a grid, placed it in front of my son’s face and slightly above him, pointing down at a slight angle. I took an incident meter reading towards the light using a light meter, and then under exposed by about half a stop. It’s a simple, but striking shot.
Summary : In the Field Testing
I took the Profoto B2 through 3 real world scenarios : a fashion shoot in a studio, a fashion shoot outdoors where I overpowered the sun, and an indoor portrait where I overpowered the ambient light.
The Profoto B2 handled each scenario with ease. I was left somewhat surprised as I thought it might struggle with power in some scenarios. Instead, I never shot at full power – even when overpowering sunlight outdoors. Without the Magnum Reflector, however, I would have shot using full power, but this is simply a case of knowing how to use what you have, and using it effectively.
While the B2 Heads are compact and lightweight, they lack a grip at the back of the head like the Profoto B1 and D1 heads have, making it challenging to remove bigger modifiers like softboxes. I often found myself having to remove the entire head from the light stand in order to remove a softbox. Understandably, a bigger handle was omitted to save space and weight but I feel that a smaller grip such as a swivel ring that you could grip with one or two fingers could have been incorporated into the design.
Moving the B2 around while on location is a joy. With the heavier B1, I often remove the head from the light stand and pack it away before moving, even if it is just for a small distance on location. With the B2, it’s simply a case of collapsing the light stand’s legs, hanging the battery pack over your shoulder and walking where you need to go. The lighter B2 heads really make a big difference in small ways, in a similar way that the B1’s lack of cables really makes a big difference.
Who is the Profoto B2 for?
When I first heard of the Profoto B2, I was somewhat confused. It’s a battery pack with half the power of the Profoto B1, more compact and lightweight, yet more expensive than the B1.
As an owner and regular user of the Profoto B1, I have come to love the power and convenience of the Profoto B1, and after being used to the convenience of the B1, I find it hard to fathom why anyone would pay more money for less power and go back to a system where you have to deal with cables. Anyone who has ever used a Profoto B1 would agree that on paper, a cableless system sounds like a small deal, but it makes a huge difference when you actually shoot with the B1 – it’s like going from shooting with flash sync cable to Pocket Wizards. Once you lose the cables it’s hard to imagine ever having to deal with cables again.
Yes, the Profoto B2 is smaller and more lightweight than the Profoto B1, but it also has a number of drawbacks which we’ll get to.
Since using the Profoto B2, I’ve had some time to wrestle with my thoughts about the Profoto B2, what it offers, and the differences between the B2 and the B1 or any other product on the market for that matter.
The B2 is a fairly powerful system in a small package. If you compare it to the B1, it’s got half the power, but if you compare it to a speedlite it’s got about 4 times as much power. The B2 offers 1 or 2 very small and compact heads. If you plug in 1 head, you’ve got 250 w/s to your disposal on a head that is almost the same size and weight as your average speedlite.
With the Boomerang bracket, you can mount a strobe with 250 w/s on your camera. If you think about it, that is quite revolutionary. If I said to you a year ago that I want to build a bracket to mount a studio strobe to the top of my camera you would have thought I’m crazy, but today we have a system that does exactly that. It’s pretty significant to be able to mount 250 w/s on your camera.
With the small heads, you’re also able to place them on boom stands and position them in angles that were not possible earlier. You could place a bare Profoto B2 head on a boom stand, and ask a woman to hold the tip of an extended boomstick and almost hold it out horizontally with very little effort. That’s simply not possible with a B1.
Finally, the advantage that the OCF modifiers brings when combined with the Profoto B2 is significant.
The Profoto B2 with 2 batteries and 2 heads fit in the Profoto B2 location bag, which is the size of a small duffel bag. The Profoto OCF 2’ Octa and Profoto OCF 1×3’ Softbox packs up very small, and fits neatly on top of the B2 location bag. The location bag is a design marvel, and the unsung hero of the Profoto B2 that brings everything together.
The notion of being able to travel with a small bag that holds a battery pack, 2 heads, 2 batteries and 2 or 3 softboxes is just as outrageous as the notion of being able to mount a 250 w/s strobe on top of your camera – a concept that was simply not possible before the launch of the Profoto B2. My feeling is that the Profoto B2 performs best as a 1 head system. This is where it has the most power, is the most portable, and quickest to use.
Those doing lots of on location portrait shoots, or model tests where you have to do multiple locations in a short space of time will love the versatility of this system. Wedding photographers will find the Profoto B2 to be a natural fit for their needs. It’s a system that can work and move as fast as you do.
Why not just use a few speedlites?
Speedlites will always have a place in a photographer’s arsenal, and I feel that the Profoto B2 is not really competing with speedlites or more powerful strobes for that matter.
Speedlites are wonderfully compact and lightweight. But they have one major drawback apart from the obvious longer recycle times you get on a speedlite. There’s a limited number of modifiers available for speedlites. True, you can use an umbrella, snoots, small softboxes, or even bigger softboxes with the use of speedring adapters. But as soon as you use something bigger than a 1’ softbox, you need to use 2 or 3 speedlites to increase the power and spread of light.
All of the sudden, you’re taking a speedlite which is compact and quick to setup, and suddenly you’re dealing with 2 or 3 speedlites that you have to connect to some sort of speedring, have batteries for all of them, and control them with some wireless radio transmitter. Not only has the cost factor increased significantly, but the convenience factor of using a speedlite has decreased to the point where something like a Profoto B2 suddenly makes a lot of sense.
Some Drawbacks of the Profoto B2
As with any system, there’s always a few drawbacks. The Profoto B2 has a few drawbacks that you need to be aware of.
- Inconvenience of Using Cables: A drawback when compared with the B1.
- Power Loss with Extension Cable: A further 1/3rd stop of power is lost if you use the 6.6ft extension cable.
- Lack of Profoto Zoom Functionality: The Profoto B2 is the only Profoto head I know of that lacks the Profoto zoom functionality that allows you to move modifiers up and down the head to alter the spread of light.
Some advantages of the Profoto B2
- Compact, Lightweight: The compactness, weight and footprint of the system is the biggest advantage of the Profoto B2, and is ultimately what the Profoto B2 is about. Like with all things compact, this usually comes at the expense of a few other things.
In the case of the B2, the drawbacks are relatively minor when viewed as a whole or in isolation.
Capable
The B2 is a very capable system. I never found wanting for more power in the studio.
To overpower the sun, I found the B2 had enough power to comfortably overpower the sun in head and shoulder portrait situations.
For full length portraits where you need to stand a bit further back, I found using the Magnum Reflector left me with power to spare.
Summary
I really enjoyed shooting with the Profoto B2. It’s a product that’s easy to use, well built, portable and powerful enough for anything that I would ever throw at in the real world.
It does have some compromises, and that’s to be expected with a system of this size and weight.
I found the 250 w/s enough for everything I did, as I only used 1 head. Those intending to use 2 heads might run into power issues depending on the shooting environment. If you’re going to use 2 heads in a studio, you will probably run out of power and will have to resort to either shooting at wider apertures, consider a more powerful pack or look into pairing the B2 up with a B1. If you’re going to be using the B2 on location and need to use 2 heads for fill flash, or 1 head as the key light and the second head for a bit of fill it will have more than enough power to get the job done.
The ability to use the Profoto B2 with just about all of the Profoto modifiers is what makes this system so powerful when compared to speedlites or even other strobes. Profoto has one of the most extensive lines of light modifiers of all manufacturers. If you can’t afford the modifiers, you can always rent as there’s a Profoto rental house in just about every major city of the world.
The biggest advantage of the Profoto B2 is that it packs a lot of power in a small package. With the OCF modifiers it really packs up small. The B2 Location bag is ingeniously designed, allowing you to pack a B2 with 2 heads, 2 batteries, and up to 4 modifiers in a bag smaller than a typical gym bag.
In the end, I cannot help but feel that the Profoto B2 is a game changer. Perhaps more so than the Profoto B1 was, and that says a lot. The fact that you can mount a studio strobe to the top of your camera, or have a portable strobe capable of 250 w/s that is about the same size of a speedlite is revolutionary.
Perhaps, in 10 years time, we will all look back at the Profoto B2 as the battery pack that changed it all.
Acknowledgements
Thanks to Profoto South Africa for supplying the Profoto B2 and OCF modifiers for review.
Review and photographs shared with permission. The Profoto equipment is available through Orms Direct.


