Russell Smith shares advice on creating composite images, inspired by Erik Almas’ philosophy on making, and not taking, photos.
Words and photos by Russell Smith, a Cape Town-based photographer.
At the end of last year sometime I was introduced to photographer named Erik Almas. It happens to me every year around December time that I look at other photographers out there for inspiration.
I find this not only gets to open my photography eyes to new ideas and styles, it also introduces new ways that I can introduce techniques into my own work. The potential downside is that one can end up going up and following a lot of different paths with out remembering your unique style and voice. Always trying to chase another person’s work style. I think it is important to delve into but not lose yourself in other’s work.
So back to Erik.
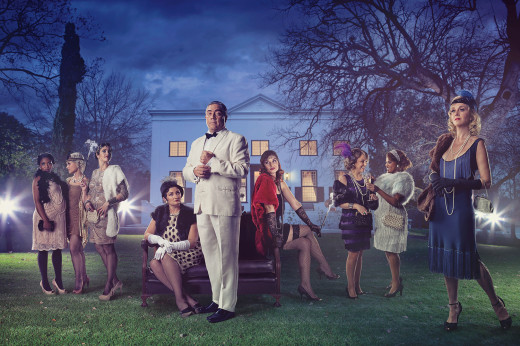
His philosophy, and he is a philosopher, is to make images, and not take images. By this he means: controlling the lighting on his subjects, be it in studio or on location. Choosing the correct conditions of the background landscape in terms of angles, light and time of day that best represents the mood he wants to create. Then by cleverly matching angles, grades and lighting with post production placing the subject/s seamlessly into the environments.
This sounds easy in practice but is reliant on above all good knowledge of light and post production compositing. There is nothing worse than a bad comp job.
Some things to consider (and thanks to Erik Almas for most of these tips).
- Conceptualise the image in your head and even better on paper, with positioning as accurate as possible. This will also help your team to visualise the moment and your post production guy will get it immediately. It is good for lighting sense and possible eye contact between different individuals.
- Shoot the background plate first. Have the overall image and what you plan to do with it in your head first but it helps to see the light sources and positioning for your models in studio after. It is also easier in studio to test the height of your camera from the floor to match the location angle.
- Measure your height of lens to floor when you shoot both and keep them the same.
- Take a shot of your assistant or someone in your location plate so you have an idea of scale. This can also sometimes have the effect of giving you a shadow you can use. Remember though to get them out of the shot once you have the reference. You need a clean plate.
- For group shots, when shooting the characters, move your camera left and right (at the same height) to get the perspective right. Don’t pan, as there will be distortion.
- For group shots, it may be more realistic to make smaller groups of 2 or 3 together. The interaction will be more believable, the shadows match and a little less time shooting in studio for you.
- Have a great retoucher!
While I once was a purist, and in some circumstances I still am, here your plan is to create a composite. In Photoshop, you can bring in everything of the best together into one image. You have to love and hug digital with both your arms and this is where it is powerful.
Of course you need the time and budget for post production to do this, and I am in no way suggesting that all clients go and make their photographers do this.
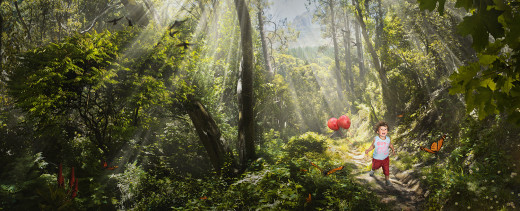
The process is technical and sometimes can be blamed for lacking spontaneity, but that is what I like about it too. You can control the set up better, the lighting is yours to play with in studio with your models. Like I did with the butterflies from Butterfly World that I shot and the giraffe and Mavis in Kenya while I was up there, your imagination can go wild if you have all the elements. I treat this like a magical and beautifully lit still life and that is probably the connection I have to Erik’s work. Thanks Erik!
Article originally appeared on Russell Smith’s blog, and has been reposted here with permission.


