Professional advice from Desmond Louw to those just starting out with DSLRs: How to effectively make use of shutter speeds.
Written By Desmond Louw. This is part two of a three part series dealing with aperture, shutter speed and ISO sensitivity.
Understanding the three most important things about lighting
Part 2: Shutter Speed
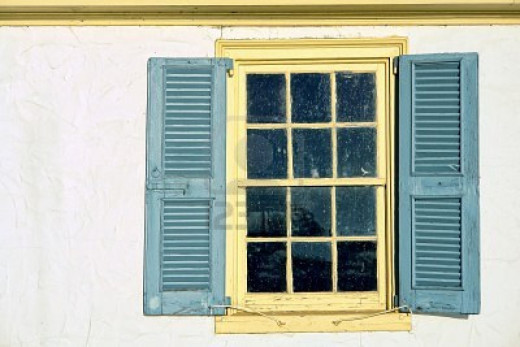
Remember the post about aperture? Allow me to again use the example of the window of a house with shutters.
The wider the shutters are open, the more light comes into the room. The aperture on your lens is similar to this. As your aperture gets larger, it lets more light in, and as it gets smaller, it lets less light in. But lets add another factor; the longer it is left open, the more light will come in. This is your shutter speed.
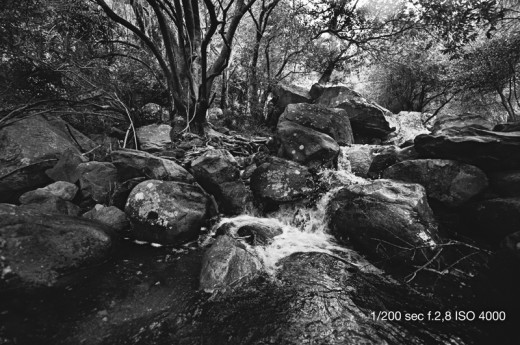
While writing this post I decided to go to Deer Park in Cape Town quickly and take some pictures of a waterfall to demonstrate the difference between a slow and fast shutter speed.
This photo had a fast shutter speed (1/200 of a second). Note how the splashing water is frozen, the shutter just opened for a split second and before the camera sensor could pick up any movement of water, the shutter closed already.
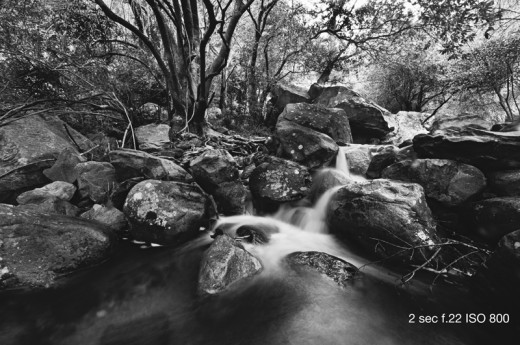
Now lets make the shutter speed slower and slower and see what happens.
The next one had the longest exposure of 2 seconds, so while the shutter was open the water had the chance to flow, and the sensor recorded all of this!
I used a tripod for these photos of the waterfall. When your shutter speed gets lower than 1/125 I would suggest you use a tripod to prevent camera shake.
The next two photos where taken at night, I left the shutter open for a few seconds while cars and bikes passed me:
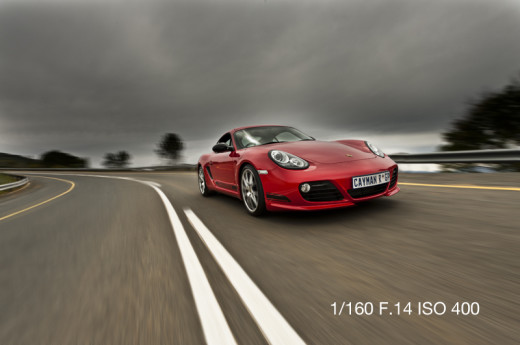
A slower shutter speed can be used to pan an object. This means you keep the camera steady with a tripod or monopod with a fairly slow shutter speed of roundabout 1/160 of a second. Then you follow your subject and while moving with your subject take the shot! This means your subject will be nice and sharp but its surroundings will be completely blurred. You might want to put your camera on continuous focus when you do this, as this will make sure your moving subject will be nice in focus.
The next few were taken at a slow shutter speed while I was moving with the subject (in the boot of another car going 100+- km/h…)
This means I can get nice and close to my subject and still have the feeling of speed with the moving scenery, tar and wheels.
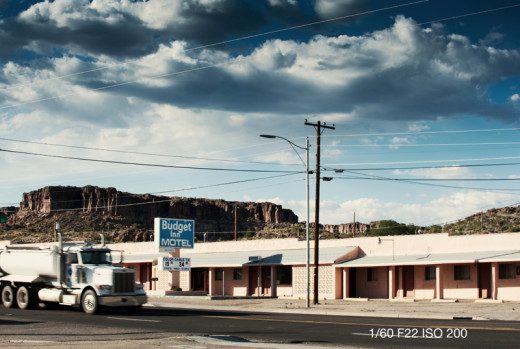
In the next photo I wanted to show the scene, and also have the truck in the photo, but I didn’t want the truck to steal all the attention so I made sure he is blurred with a slower shutter speed.
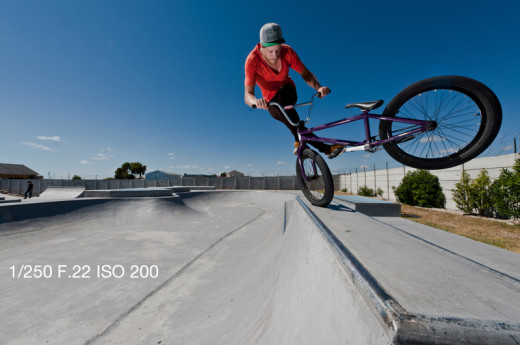
In this BMX photo I tried to freeze the subject with a high shutter speed, but the Elinchrom Ranger I was using as fill in flash limits me to a shutter speed of 1/250. You can actually see the back wheel being a bit blurry.
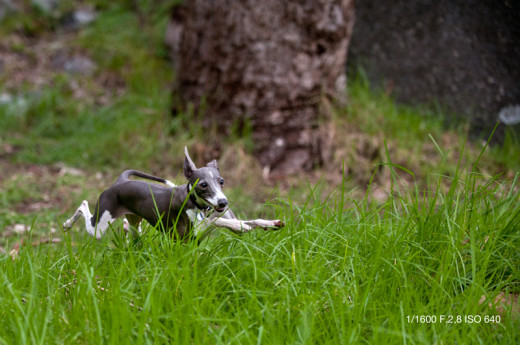
If you are taking photos of something moving very fast, like in this case an Italian Greyhound you need to push you shutter speed high! This shot was taken at a shutter speed of 1/1600.


