
Dewald Kirsten shares everything you need to know about composing and taking amazing landscape photographs!
Article and photos by Dewald Kirsten, a landscape photographer based in the Western Cape.
Hello there and welcome to the second installment of my guide to shooting landscapes. I hope that you enjoyed the first part in the series on planning your next landscape shoot. Now we are taking it to the next step, Landscape Photography Composition.
This is most likely the most fundamental part of any photo you take, be it landscape or portraits or wildlife. It is also the one place where most people struggle to make their work look amazing. It is the very next thing you need to keep in mind once you have planned your perfect spot and you are there and the magic is happening. Where to start? What to look for? What to keep in mind?
This is how I would approach a landscape, and don’t get me wrong, there are many days I am out there where the compositions are just not working at all.
- Plan my location. Via Google maps and the apps mentioned in the previous post, I will get a good feel for the terrain where I will be working. So, if I do have time, and if it is easily accessible I will go out and scout the location first. Plan if you will be shooting into the rising/setting sun or with the light. This preparation will make a huge difference on the day.
- I would go out the day before and scout the terrain. What is there to work with, is there suitable foreground, middle ground and horizon subjects to use. What would be the main feature of the shot? The view, the ocean, the sky, the foliage etc? Things like these all needs to be planned so that when you get there you don’t have to stumble around just to get something to work with. And guess what? While you are stumbling around the magic will be happening and you will miss it!
- Mark a spot, use a rock, a stick or something so that you can easily find it again when you go back later on.
- Search for a foreground subject. This will be the anchor of your image, so look for something that would catch the viewers attention. More on this in a minute.
- Have a look at what would lead my viewer into the image from the foreground anchor. Be it the curve of the land, lines on the beach, rocks or what ever. It needs to draw your viewer to the horizon.
- What is going to be on the horizon? Will it be open or with a landmark or what would make a nice end of to what you are seeing.
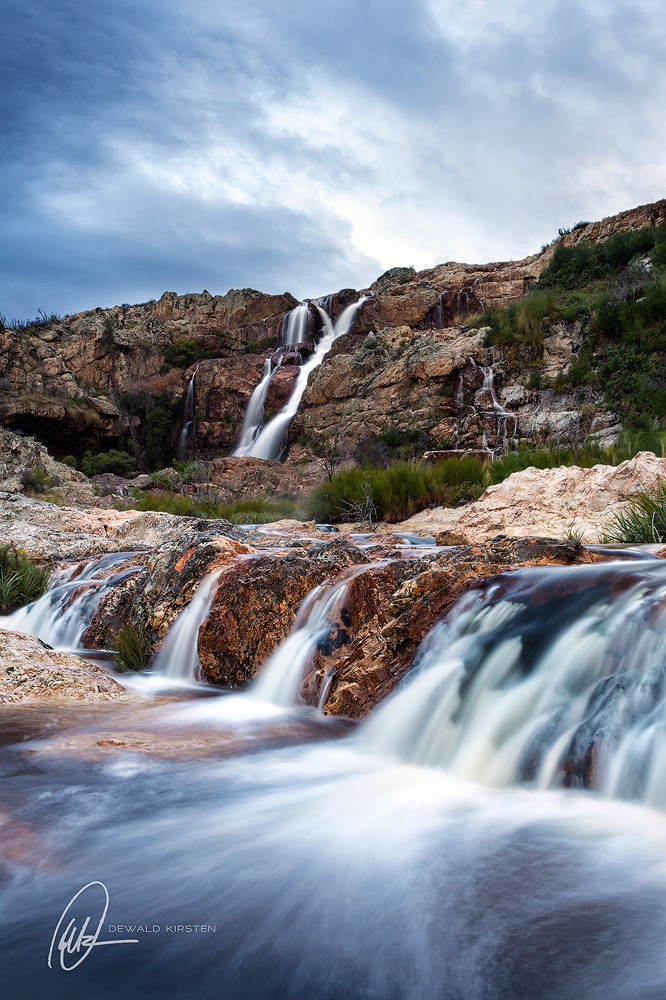
Once you have a final image in your mind of what you would like your viewer to see, then you can start working on setting up your shot. Even here there is more detail to consider. Are you going to shoot with a really long exposure to blur out water and clouds? Are you going to shoot with a fast shutter to freeze the motion? Or is there no moving subjects that would require blur to induce drama. Even puffy white clouds could make for a dramatic feature with a long exposure image.
So lets get down to the nitty and gritty.
There are three parts to most landscape photos:
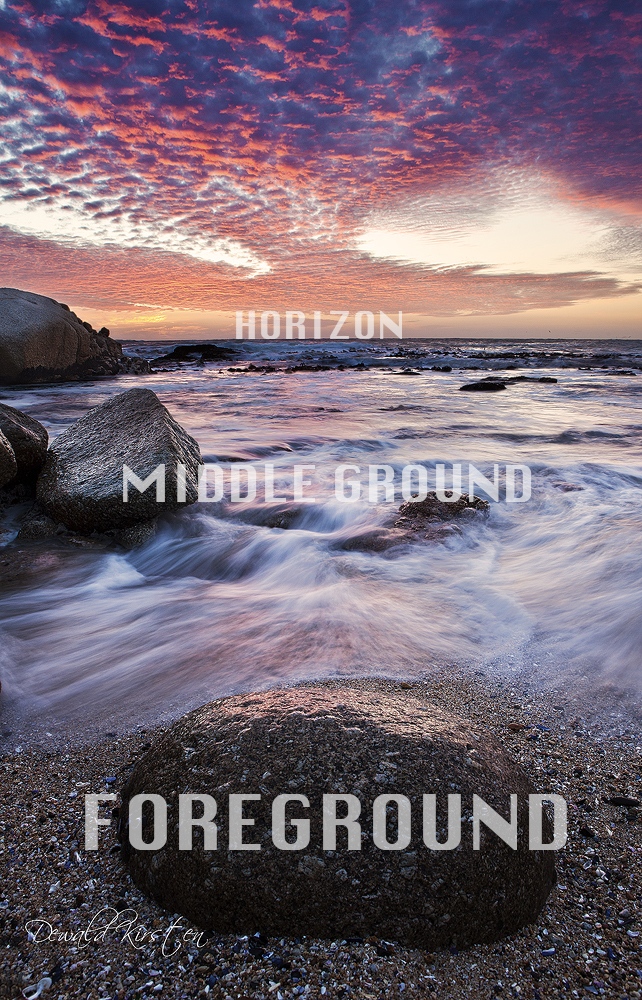
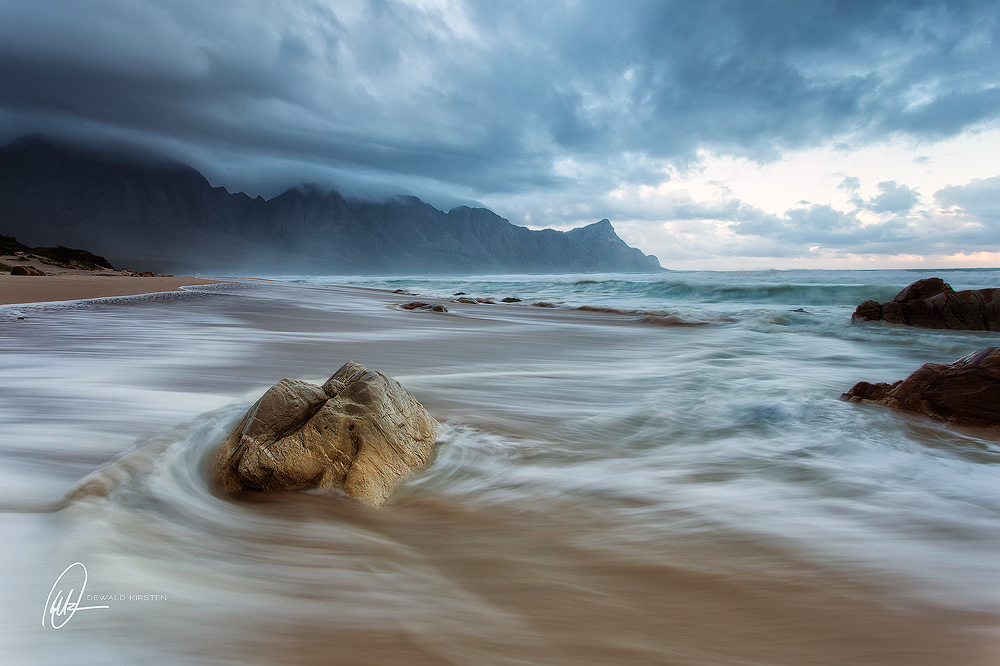
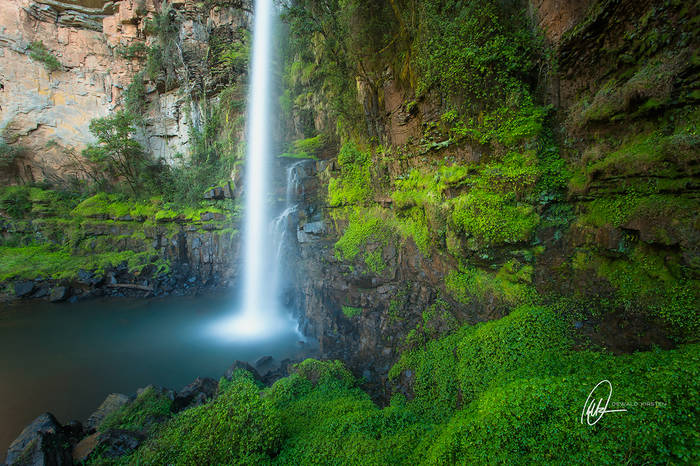
Foreground
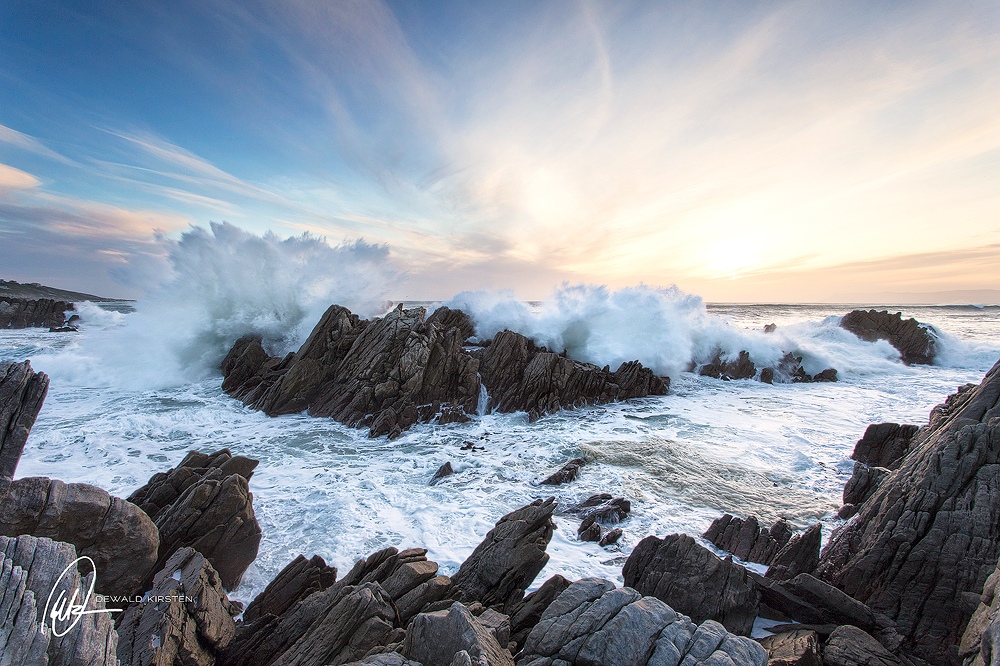
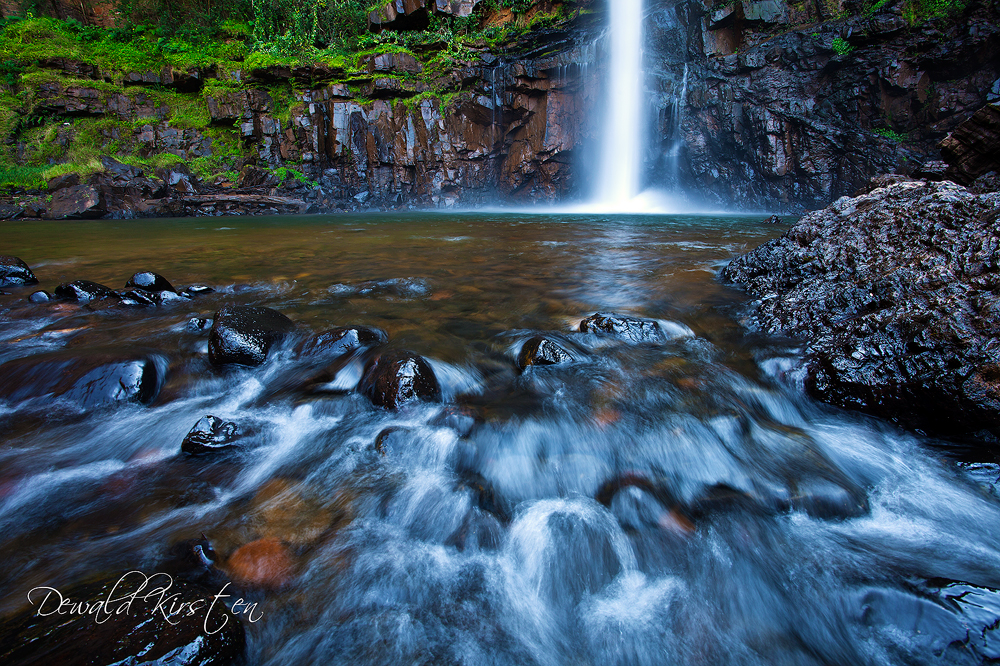
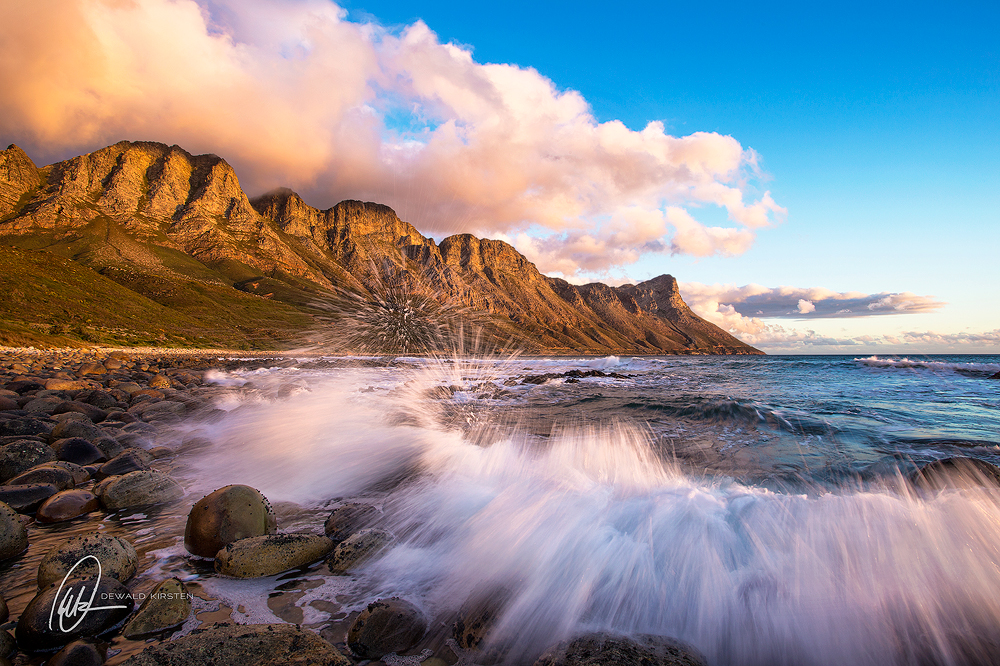
When you are viewing a scene, you can see everything from your feet to the horizon, that is one thing that people struggle to convey to the viewer. What was at his feet, why was he there, what did he see? These are questions you must ask yourself when you are setting up. Find something interesting that will grab the viewer’s attention and start to tell the story of the image. Rocks, flowers, trees etc. Sometimes I would like a moving subject as my foreground anchor. Like a wave or a splash from a wave. Or you can use a static foreground subject like a rock on the beach and use the flow of the water around that rock to form your leading lines and mid ground of the image. Often its the simplest subjects that makes the best foreground subjects. I have used anything from shells on the beach to trees to bushes.
Middle Ground
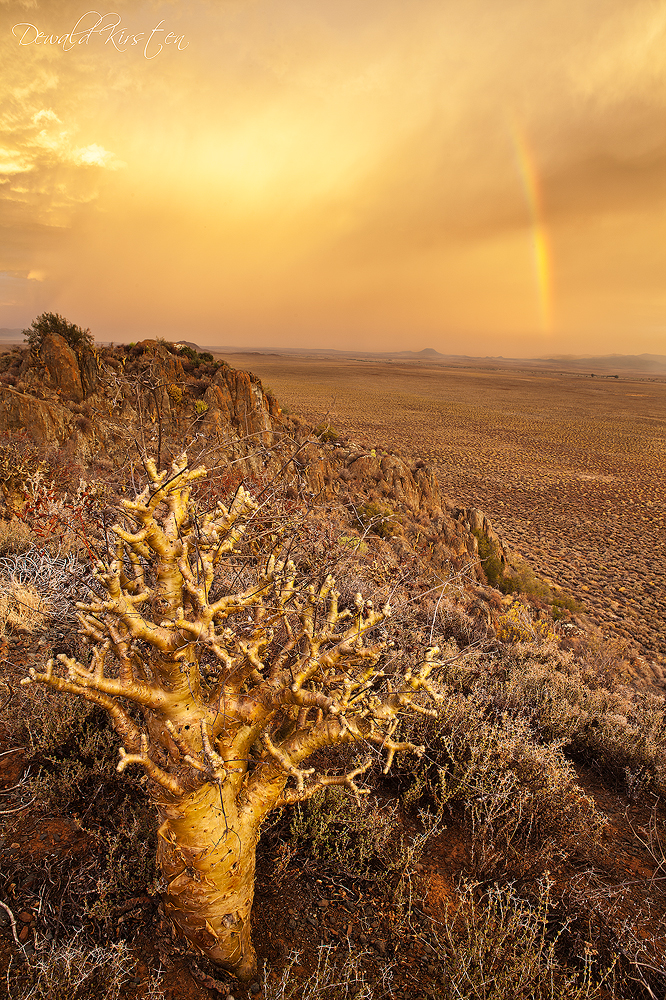
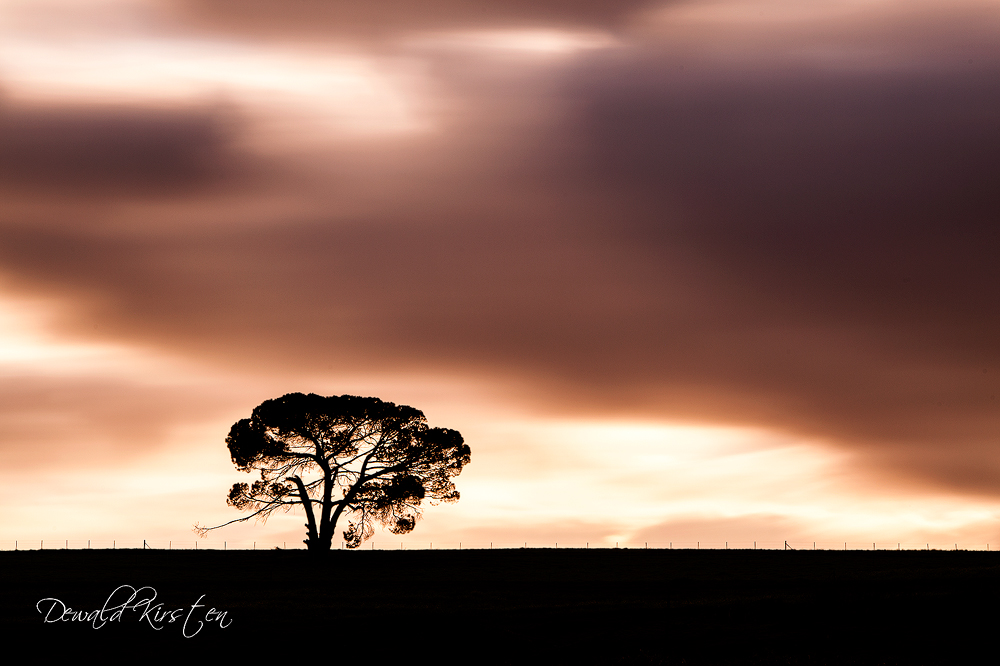
What is happening between the viewer and the horizon? This needs to keep telling the story of why you are there and it must keep leading the eye to the horizon. This will also depend on what type of scene you are shooting, does it need a prominent middle ground? Would a middle ground make the image so much better? These things will depend on how strong your foreground subject is. If you have a huge tree that is the main hero in the image, the image might do well without a middle ground. If you are shooting up high on a cliff, a middle ground could be useful as it will show the viewer WHY you were up on that cliff for instance.
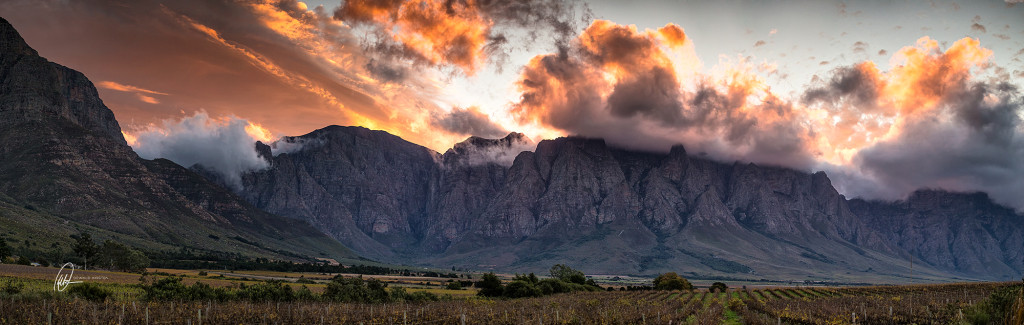
Horizon
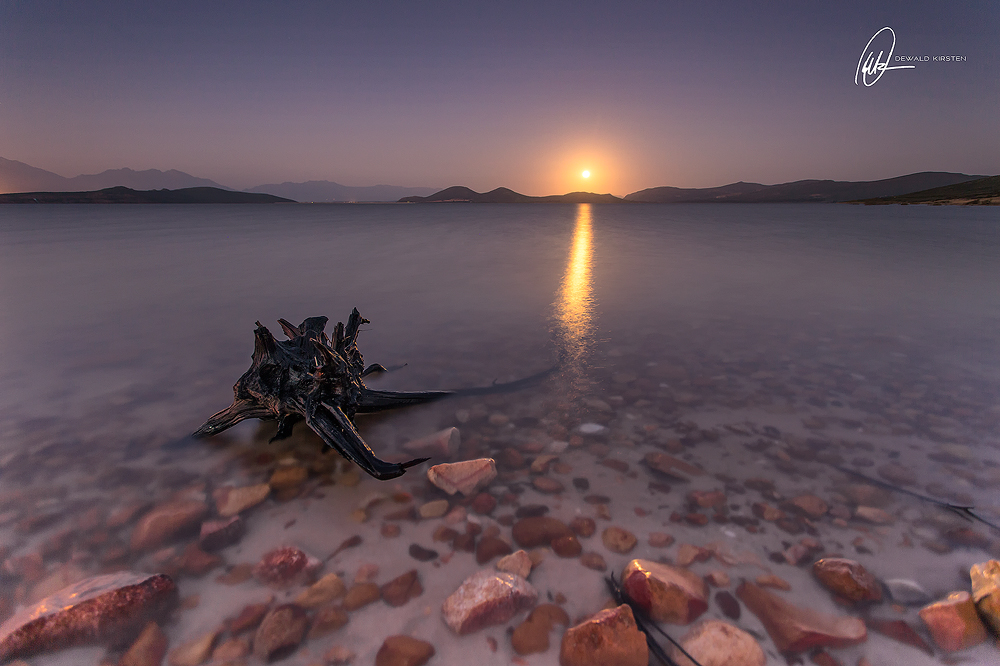
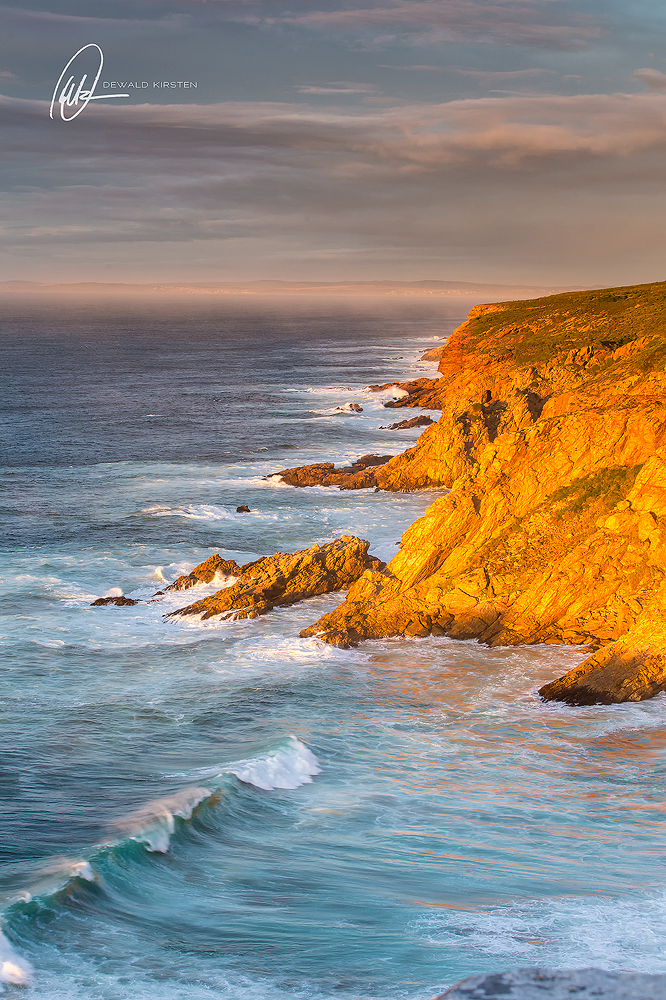
This part tells a very big part of the story. What is in the distance? What was the photographer looking at etc, all these concepts you must try to convey to the viewer. It is not always possible to have a very prominent horizon, but when you do have one, make sure it tells the part. Having something on the horizon that just breaks it could work wonders for a photo. Often a prominent landmark is used, think of Table Mountain. It is iconic but it is simply not something that can be used as a middle or foreground subject. So when shooting something like Table Mountain, make sure you have something nice in the foreground and middle ground that draws the viewer to it.

NB! YOUR HORIZON MUST BE STRAIGHT… There is a place for skew photos, but it’s not in landscapes, you will not see the sea draining out to the left or the right.
These are some of the important parts to consider when shooting landscapes, here a wide angle lens plays a big role in fitting all of these elements into one image. A decent wide angle lens will enable you to add all these elements to your shot. BUT, you have to remember what your trying to show with your image. If you are trying to show the main subject on the horizon, your wide might not be the right choice for it, maybe a longer lens like a 50mm or even longer will be better. With a wide angle, the further away something is from you, the smaller it will appear on the image.
But then again, I have shot and seen images taken with telephoto lenses that has more impact than a wide angle shot…be that as it may, the same principles still apply to all of them. The effect you will get with a longer lens is very different. The longer the lens, the more compression you will get. Something that could add a heap of drama to your image.
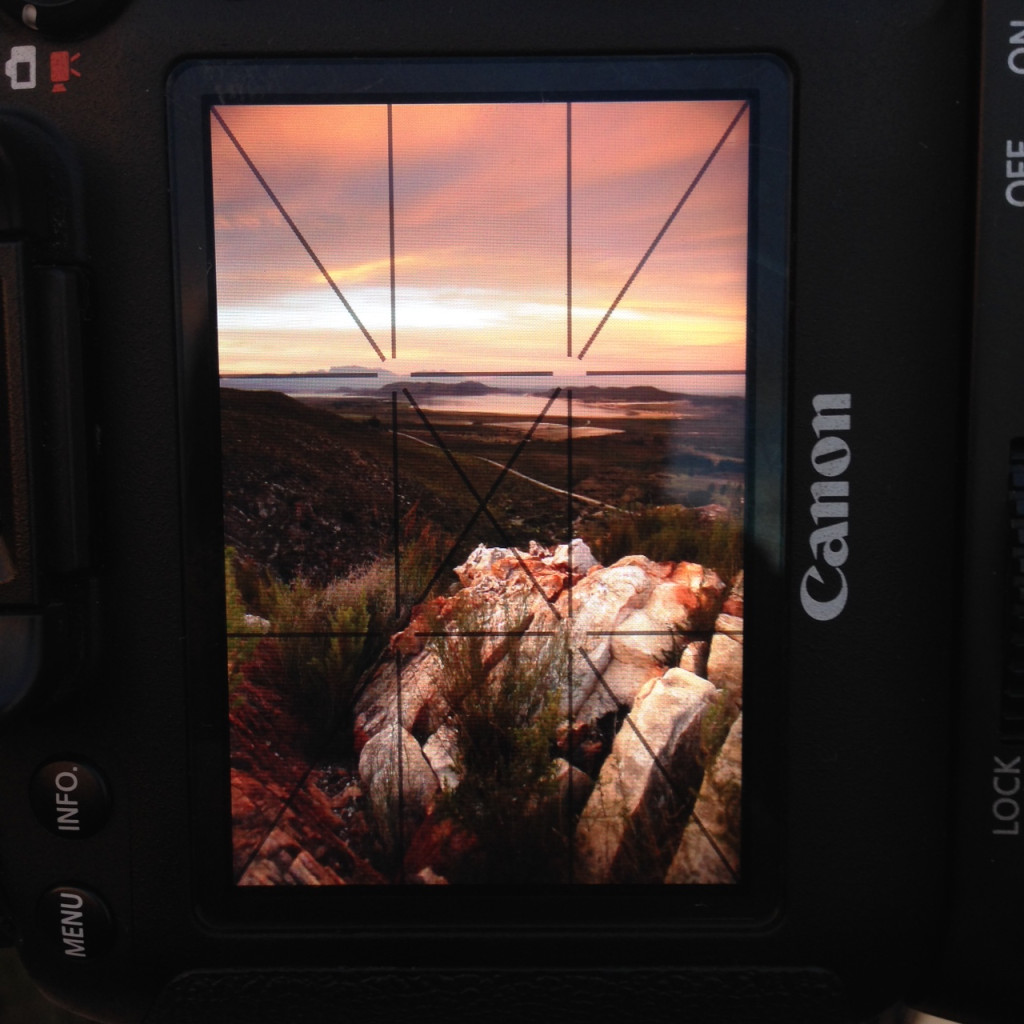
The Rule Of Thirds
Basically what this means is that you need to break your images into 3 equal sections, bottom, middle and top third, be it portrait or landscape orientation. I have this set up on my live view screen on my camera. This makes it a heap easier to line up your composition and to straighten a horizon. Where these lines intersect, they form a key focus point in the image and give a good indication of where to place your foreground anchor and then form the leading line to the subject on the horizon. I have also got the diagonals set up on my live view display, this helps me visualise these leading lines when I compose the image.
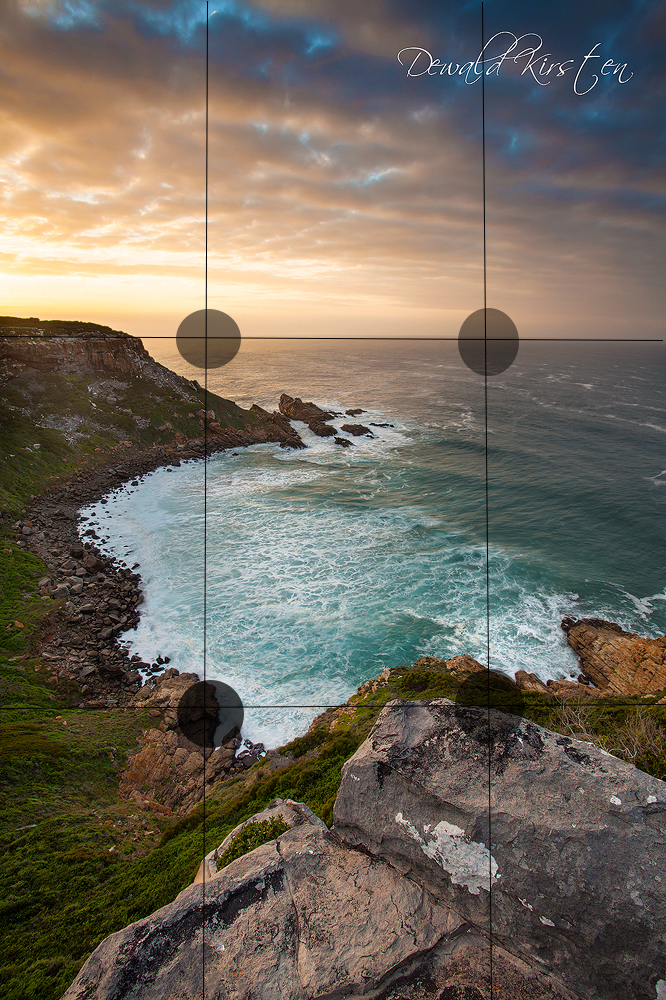
Then again, like with any other rule in photography, this rule may be broken if your scene requires it such as in the case of an image with a reflection. Reflection images looks best when mirrored and to achieve that its best to have the horizon in the middle of the image. Or if the subject is of such a nature that the image just would not work if it was divided into thirds. Bear this in mind when you are out there shooting. This is another good reason to use the live view function on your camera. It enables you to get a good idea of what the final image would look like before it has been captured.
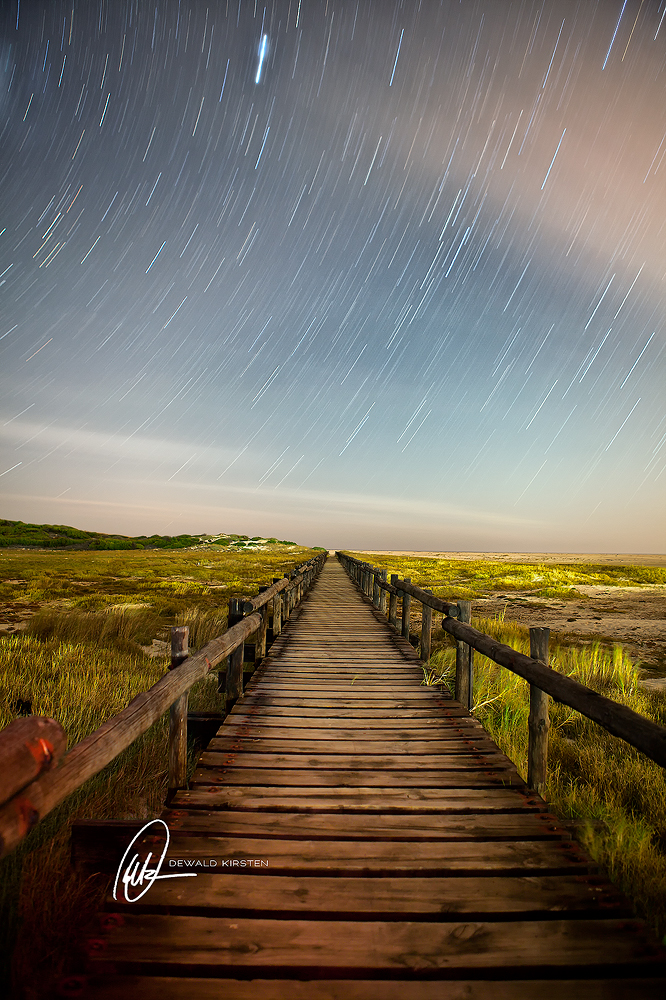
Leading Lines
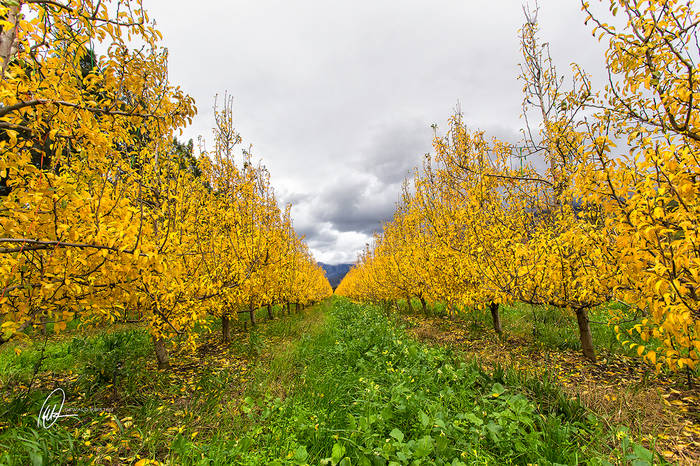
These are lines that will lead the eyes into the image, they lead them from the foreground to the horizon or to a specific focal point in the distance. This can be anything, a lane of trees, roads, rocks, ridges in a mountain etc, there is quite a few and this is a part where you can be really creative.
Leading lines work great if they run diagonally to the horizon. Here the diagonal lines on my live view plays a big roll. It is just so easy to line up the lines in the image and make them work.
Leading lines can really suck the viewer right into the image and combined with the rule of thirds and the focal points you can only have a winning shot!
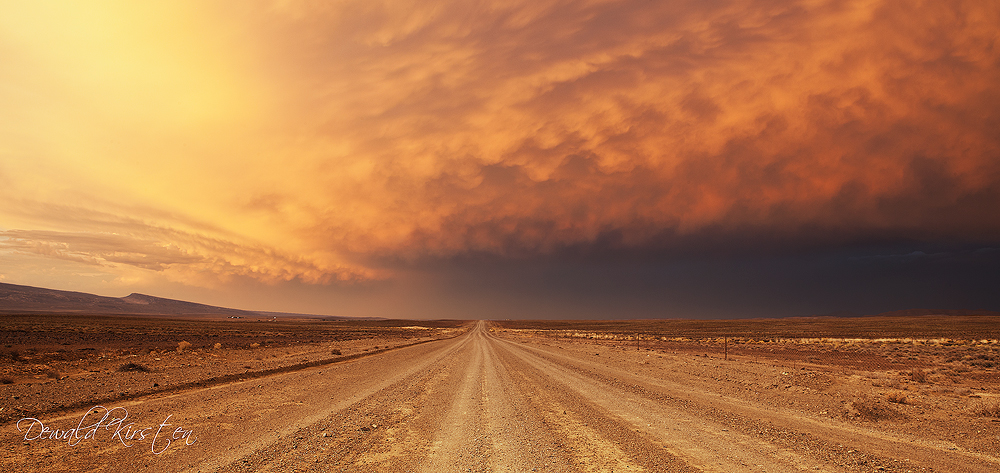
Negative Space
It is easier to say this term than to create an image using this concept. However, I found that it is easier to shoot this type of image with a long lens than with a wide angle lens. When using a long lens you can isolate your subject and then have lots of negative space around it. You can either have that filled with just a blank sky or a space filled with something like awesome clouds.
Frames
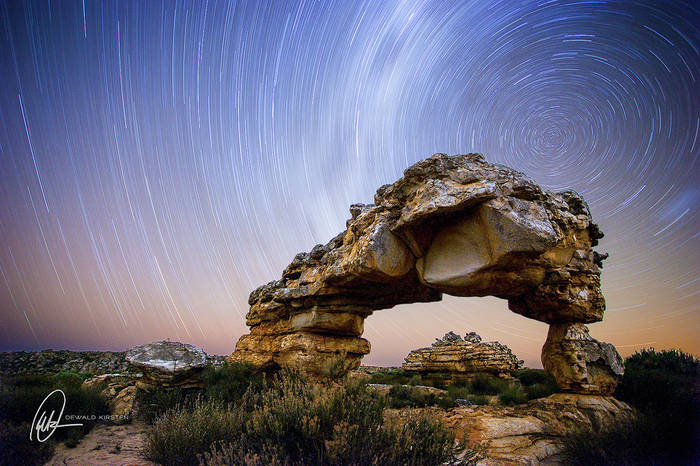
This is not always possible to do, but when it is, its is well worth considering. Frame something by shooting through something but, like I said, It will all have to do with the story you are trying to tell. For instance if you are shooting inside a barn or a cave and would like to show the viewer what the view outside that place is like, frame up through the opening. If you are able to place your subject in that frame you would have a clear winner.
Add Some Life
This can be done with animals or humans. Even if you have to play model for yourself and use a 10 second time to get into position, it could add something different to a great image. After all, humans and animals are also a big part of the landscape.

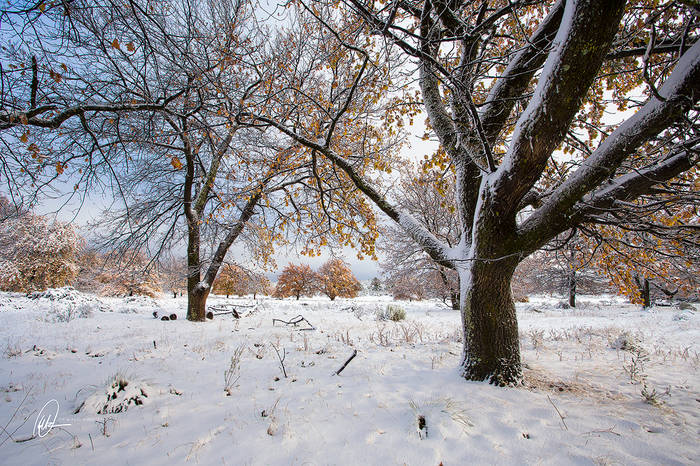
Geometry
Things that repeat in an image are also a good thing. Look for shapes that repeat in the image, circles, triangles, squares and use that to your advantage. I personally prefer the triangle shape. These are relatively easy to find and just by using a row of trees or something you already can create two triangles.
Please do not see these as rules set in stone and that if you do not follow then your images will not be up to standard. See them as guidelines. Guidelines that will improve your images. If you use them and follow them your images will step up a level. Now all you need extra is the magic light.
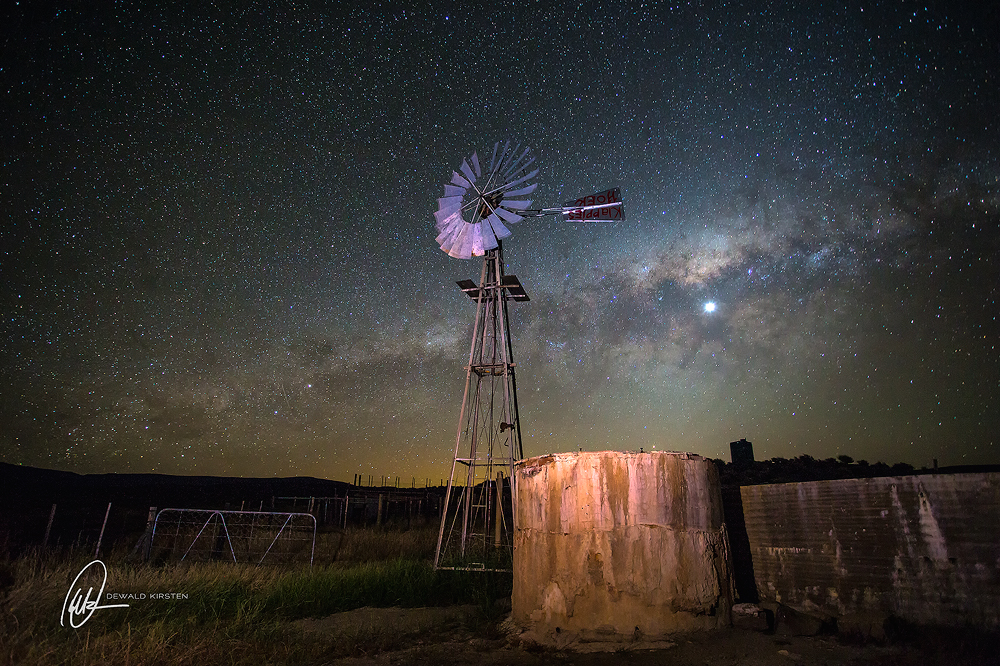
Avoid any distracting items in your images. Usually it is something that you do not plan to have in your shot, but there it was, and all it served to do was mess up the composition you worked so hard to get perfect. As a rule I try not to have any man-made elements in my images, unless they are being used as the focal point. Things like power and telephone lines can easily ruin a great image if you do not pay attention to them. I have used such man-made structures as composition items – sometimes they work and sometimes they don’t. This is also a vital part of your scouting exercise – find these things that could be distracting in your images. It is easier to avoid them from the word go, rather than try to edit them out later on in post processing.
I hope that this post was useful and that I could help you create outstanding landscape images. In the next section I will discuss some gear. Why and How I use it will be discussed.
See you soon.
PS: Please click on the images to display them in a viewer at their full potential.
This guide was written by Dewald Kirsten and originally appeared on his blog. It has been republished with permission.


