Want to take better landscape photos? Dewald Kirsten shares his very helpful advice on how to plan your next landscape shoot.
Article and photos by Dewald Kirsten, a landscape photographer based in the Western Cape.
Are you dreaming about shooting those magic landscapes that you see on the internet? If so, then please have a read here as I share some tips in planning your next landscape photography outing.
Shooting the best landscape images is more than just being in the right place at the right time, there is lots of planning involved. sometimes this begins months in advance to make sure you are there at the right time, of course this could mean that the so-called right time is not the perfect time and you need to wait another year or month to get the right conditions for the image you have in mind. If you battle with patience, the I highly recommend that you teach yourself to be more patient , because if you can not be patient you will battle with perfecting the shooting of landscapes. In many cases the same spot needs to be shot a couple of times before you finally get that one cracker image we all chase and dream about.
Where To Start?
Well that is a good question. It will depend on the subject you want to shoot. If you know you are going to visit a particular holiday destination and would like to go out and capture something nice, I would recommend you start with google. I would google the attractions of a specific town or place. This will give you a good idea of where to start. Some places has many attractions, so it will all boil down to how much time you have, how many of the things do you actually want to shoot, how many of the items are actually worth shooting and then off course the weather. The same would go for if you are planning a trip around shooting landscapes. I am currently planning a trip to Namibia and when choosing locations it is vital that you know where you want to go and what you want to shoot.
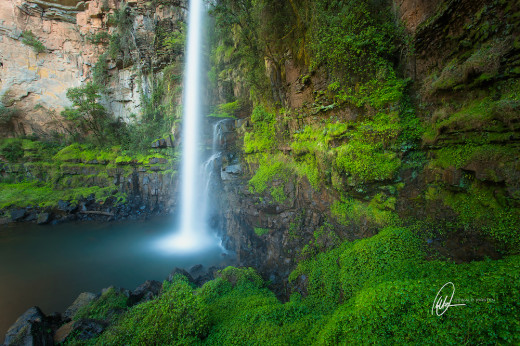
Starting with a good plan of what you can shoot in an area is vital to creating awesome images. If you know a place would have good seascapes or vistas or waterfalls then you should plan according to that.In 2012 I visited the lowveld in Mpumalanga for the first time in my life. I knew there would be some interesting things to shoot but once I started to google I discovered the amazing waterfalls of the area. So that is what I wanted to shoot. Because there are so many spectacular waterfalls, I had to make a choice and stick to that as you cant just go in and bugger around for an hour and then go to the next one and the next after that. Jumping from one place to the next will only mess you about and you will not get the best out of a location.
Google brought up two waterfalls that were pretty spectacular. Lone creek falls and mac mac falls. So I started to look for contact details of info centres close to these waterfalls just to get an idea of what to expect and plan for. More often than not many of these places would not be able to help as most of the time its the person working there that has only been there on a selected few occasions and your basic search result will give you more info than these people. I quickly figured out what I wanted to shoot and now the next part of the planning started.
Weather
The weather is after the location and shooting time, you most important thing to keep in mind. This will determine the mood and overall feel of your image. Shooting a scene that has the possibility to capture the views attention is vital, and the thing that plays the biggest role in this is the weather.
A clear blue sky might be great for laying on the beach the whole day and catch a sun tan, but it will not do much to get an attention grabbing image. Blue skies are boring for landscape photography. We as Landscape photographers are often chasing the clouds more than the scene. Clouds bring life to images. You can just feel the tension and life in an image of monster storm clouds, it’s a living breathing thing that you can actually watch and see how it is breathing and moving.
Using the technology at our disposal is vital, see the section on the techno stuff further down. Save the weather data for your location on your mobile phone and you will always have it with you. Some mobile apps will use your current location to give you a weather report, that is if you have cellphone coverage. Like I said before, www.yr.no is still the most reliable website for me and I will start following seven day forecasts about a week before I go.
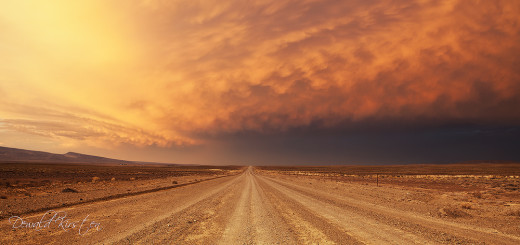
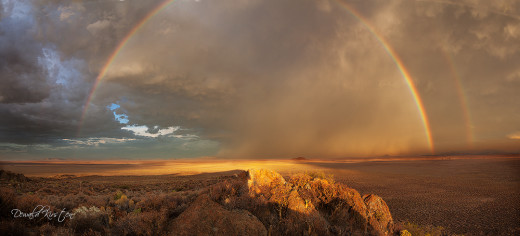
Know your clouds, know what they could possibly do and know your directions, the sun sets in the west, so if the west is open and you have clouds to the east, you know they will light up with the setting sun. Know what storm clouds will do, know that high clouds will give you great colours after the sun has dipped below the horizon, Know that sun shining INTO the rain will make for monster rainbows, know what you want in a shoot and plan for that. I have chased down storms and got soaking wet standing out there waiting for the right light and then be treated to a flaming sunset that has your whole body shaking with adrenaline.
Monster Storm cell over the Tankwa Karoo. The setting sun has light up the clouds and made t look like something from another world.
Flaming double rainbow while shooting with the sun into the rain during a thunderstorm in the Tankwa Karoo
Insane sunset that had me shaking with adrenalin after I got soaked during a thunderstorm. This is what landscape photography is made of.
But I have also gone out with monster storm clouds in the sky and in the course of waiting 2 hours for the right time, those same storm clouds would vanish into thin air, leaving you with a clear blue sky. But that is why we shoot landscapes, you can only predict so much, the rest is up to the elements, either it happens or it does not happen.
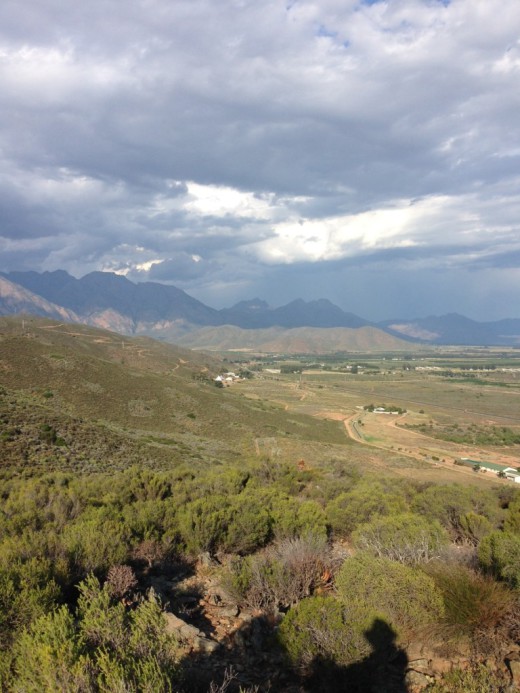
This is what the clouds looked like when I got up on that hill the afternoon to do some landscape photography. In the next image you will see what it looked like two hours later, clear blue skies.
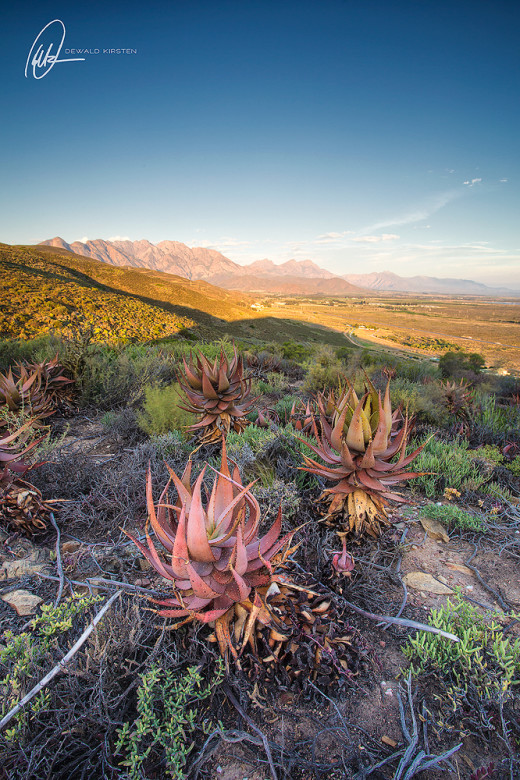
Clear blue skies after a huge storm cell just disappeared into thin air.
How To Get there And Shooting Time
Getting to the location that you want to shoot is vital. You must know what to prepare for. No point in just putting on slipslops and shorts and when you get there you must hike up a steep embankment to get to the location with the view you have in mind. Doing that will result in your excursion not being too much fun and you probably wouldn’t give your best effort for the best shot. When its possible, I would highly recommend you to take a day and scout the area you want to shoot. Its much easier to look for a path or trail in the day than it is to look for it after dark or before the sun has risen. Once you have found your way to the location that you want to shoot from, take a couple of cellphone pictures. My iPhone gets used for this all the time. This will also give you a good idea of the final image and the point of view you will have.
Landscape photographers are up LOOONG before the sun and they get home long after the sun has gone down, these are your shooting times, sunrise or sunset. Here you will have stunning light and get the best colours and contrast in the scene possible. The sun of mid day just does have the same contrast as you would get in low side light from the rising or setting sun. The actual frame of time you have to get those absolute crackers is very small, so would need to be set up and ready for that time at least 30 minutes before the actual magic happens. That will mean know what time the actual sunrise will be and get up early and don’t expect to have an early dinner.
Yes there are some scenes that can be shot in full sunlight, like shooting canola fields, the brilliant yellow flowers just look amazing in full sunlight and as soon as the sun goes down that same brilliant yellow turns dull and lifeless. So knowing what you want to shoot and planning it right will help you get there and get there in time for the best possible light.
Use The Technology
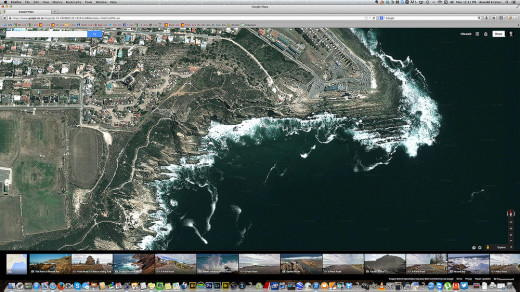
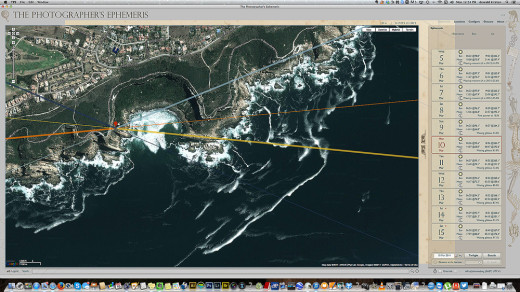
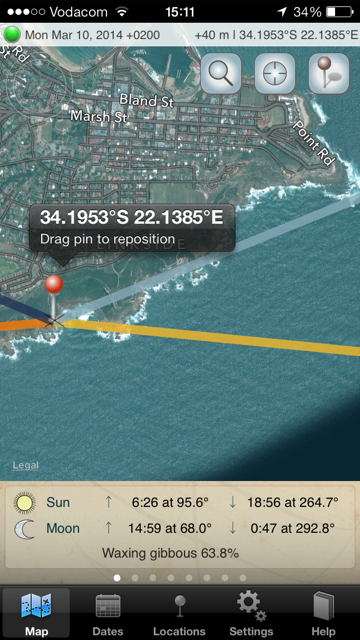
In the modern age we live in we have so much technology to our use that to not make use of it is just foolish. We can now pretty much predict the weather a week in advance and be pretty spot on about that as well. When planning my landscapes I often start with google earth. Once you have an idea of where you are going to be, google earth will show you the rest. Here you will get vital info on the layout of the area, what to expect and also to start looking for new places to shoot. Once you have scouted your shooting location, go and find that on google earth and you can start looking for angles to use of for paths or trails to get you there. The next piece of tech I would use is an app called The Photographers Ephemeris. This is an amazing app that I use for more than my landscapes. This app is available for your iOS and Android device and also on your desktop.
Screen shot of the exact area on TPE app showing the sunrise and sunset direction for that specific point.
iPhone Screen shot of the TPE app for the exact same location.
With this app you can work out the exact direction of your sunrise and sunset, also the exact time the sun will peek over the horizon or dip below it…. So, once you have your location where you are going to shoot from, now comes the use for this app. Its based on google maps and here you can drop a pin on the location you choose and it will give you the directions of the sunrise and sunset for that point! Pretty awesome! You can also save locations that you might discover via google earth and then once you plan your trip you can just go back to those markers and view the data. Another thing is that you can look ahead to a date and see what the sunset time etc will be, also the direction of the sun and everything. It really is a vital part of a good landscape photographers planning.
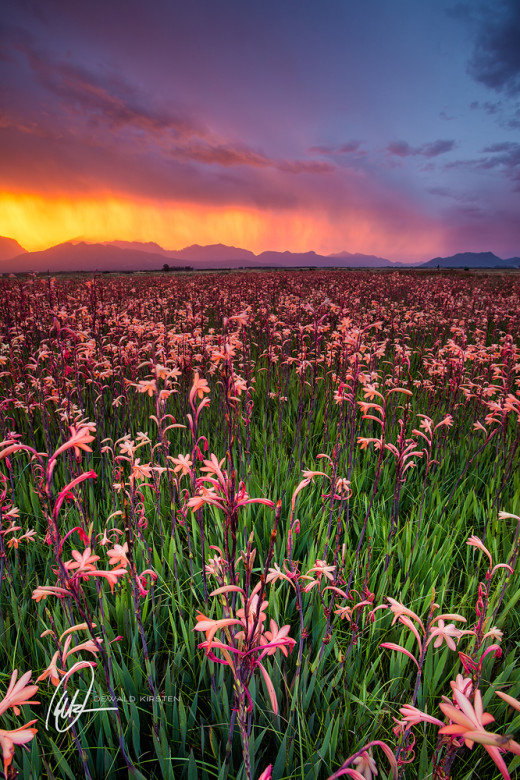
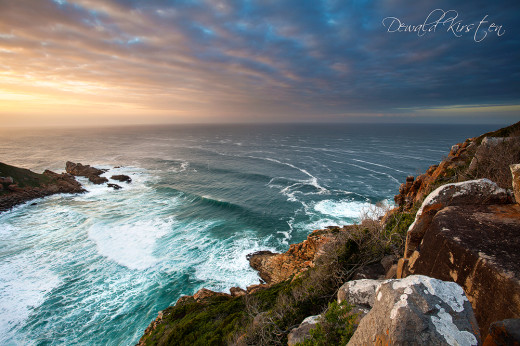
This was shot in 2012 from the exact location as the marker in these images. So you can get the idea of once your planning has worked and you are there, what you can expect.
Next is checking the weather, and you will need to know your weather to predict the right conditions to get the best light and create your best image possible. There is a magnitude of mobile apps for the weather out there, but I don’t trust many of them. The most reliable site for weather is yr.no. It is a norwegian website that is the most accurate I have seen. As with all weather sites, your best bet is the 3 day forecast, but the 7 day forecast will help you get an idea of what might be coming. The other site I use to have a look at the cloud cover is Windguru, there you will get a good idea of what level the clouds will be at. Cloud levels all have different effects on the light, so best is to know them and what they could possibly yield while out shooting.
Gear And Clothing
Your gear is probably the most important part of shooting landscapes. I am not going to argue about Canon vs Nikon, both systems are equally great and each has its own advantages and disadvantages. I shoot Canon and its a system I enjoy using and so far it has given me excellent service in the field.
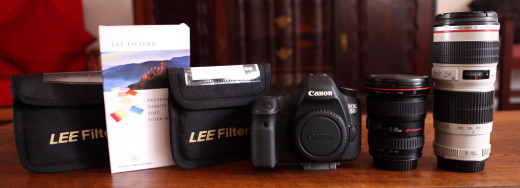
I usually don’t like to travel to heavy. I will keep the amount of stuff I carry with me to a minimum. Travel light and fast, you don’t want to miss that crucial few seconds of golden light. Normally I would carry with me my Canon 6D, 17-40 wide-angle lens, 70-200 f4 zoom lens, my tripod and my LEE Filters. If I have that I can go shoot. Other vitals are also a cable release, extra battery and extra memory cards. I would also have with me a cloth for cleaning lenses and filters, a headlamp, for when it gets dark and a bottle of water.
My general Camera gear out on a shoot, I like to travel light to get to my location as easy as possible.
Clothing is normally long trousers made of quick dry material, quick dry long sleeve shirt, hat and hiking boots. Obviously you will not take the hiking boots to the beach when shooting seascapes, but the long sleeves and trousers are very important. It will help you against sunburn and being scratched or stung by bushes and things like blue bottles at the sea. Also it will take longer for a tick to find a fleshy part to attach itself. FACT: I am more scared of ticks than snakes. The odds of being bitten by a snake is 1 in a million, but there is a 99,99% chance of picking up an infected tick while out in the field, a friend of mine was bed ridden for a week and almost hospitalized after being bitten by a tick on a shoot that we did in the Karoo so be warned!
Wearing the right shoes will make your hiking much more comfortable. Like I said earlier no point in getting there and you only have slip slops and having to walk up a steep bank to get the angle that you want. So invest in a pair of decent boots.
There you have it, some of the very basic information you would need to plan your next Landscape Photography trip.
If you feel this was helpful, then please share with your friends. Shares is so welcome and don’t forget to leave a comment for me, even if it is something that you think I might have left off of something to add to one of the existing points.
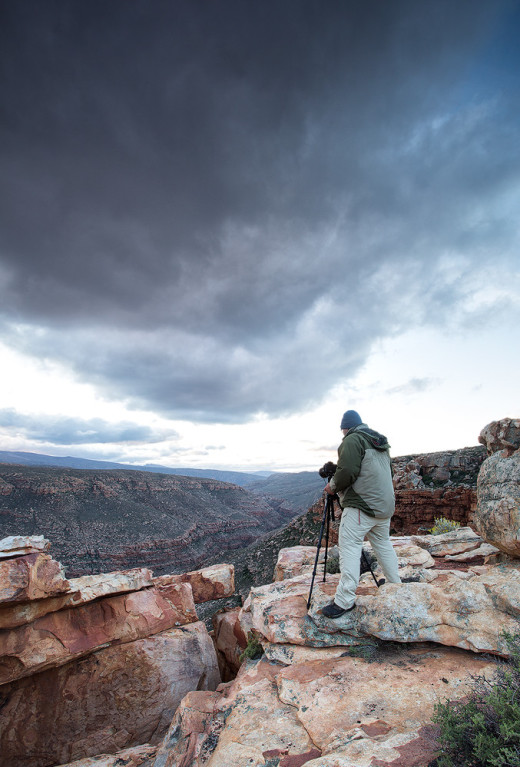 This guide originally appeared on Dewald’s blog. Photos and article republished here with permission.






Great read!