With the festive season and December-January leave just on the horizon, there has never been a better time to get outside and explore the concrete jungle right on our doorsteps, cameras in-hand. We spoke with Fujifilm ambassador and expert cityscape photographer Anton Bosman to garner his top urban photography tips, from how you can better compose your images, to some of the essential gear to empower your creative expression.

What is it about cityscapes that inspire you to reach for your camera and take a shot?
I see architecture and town planning as the ultimate art. For an architect to conceptualise a structure and for that structure to eventually become a reality is incredible to witness. I am attracted to the structures, and love how they allow for an infinite possibility of compositions.
What in your opinion are the compositional ingredients that come together to form an urban image that stands out?
As stated above, it’s all about the structure. I feel it’s quite important to isolate the structure or structures that makes one want to take the image to begin with. The moment we feel the urge to to make a photograph becomes a defining moment, and something is already drawing us in to want to make the image.
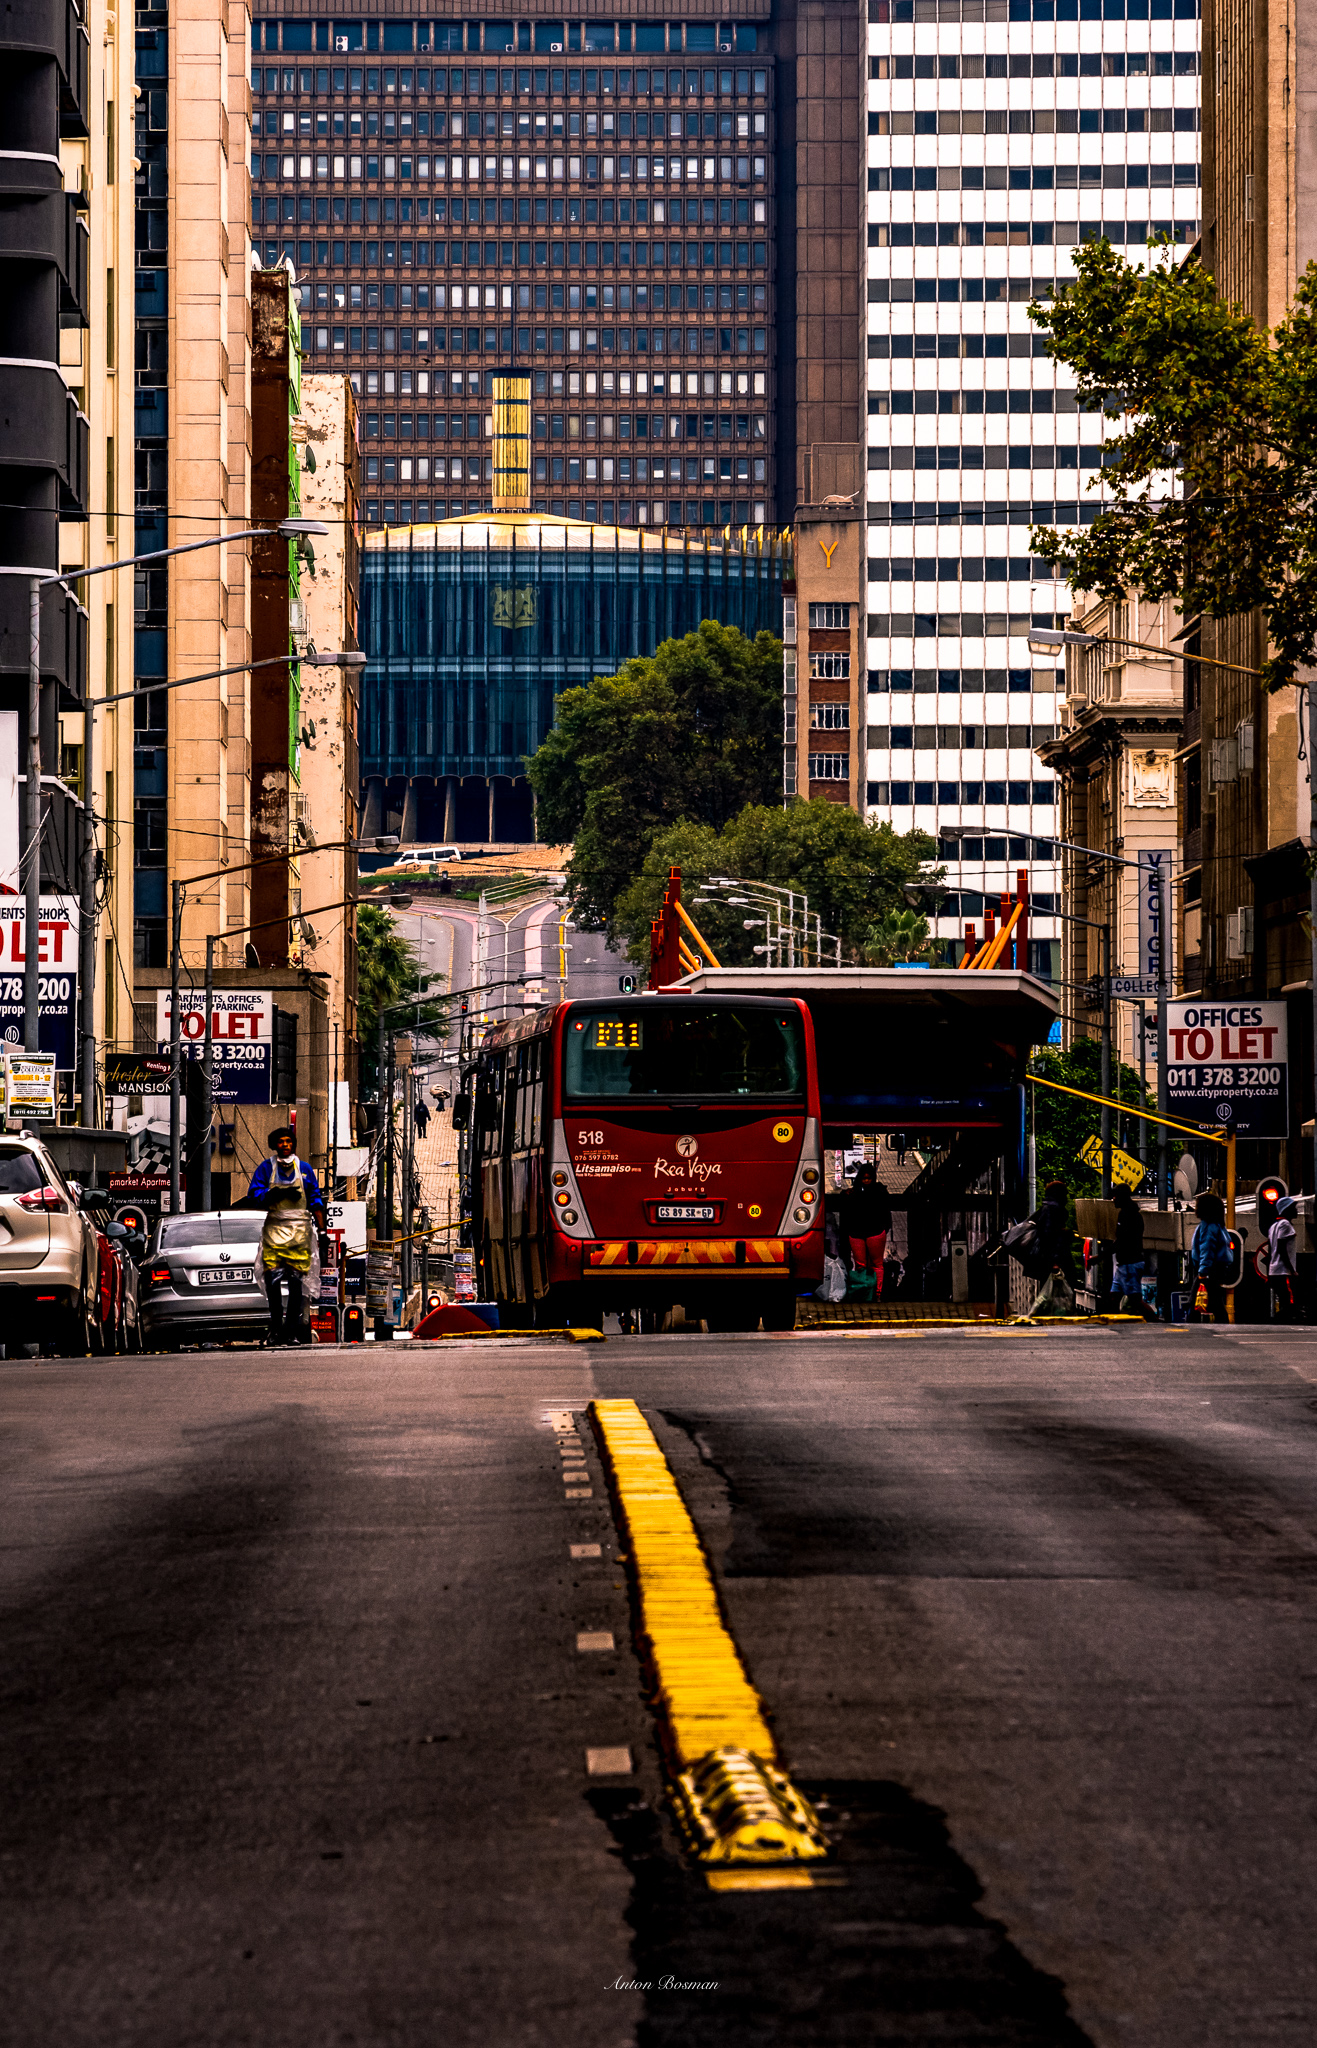
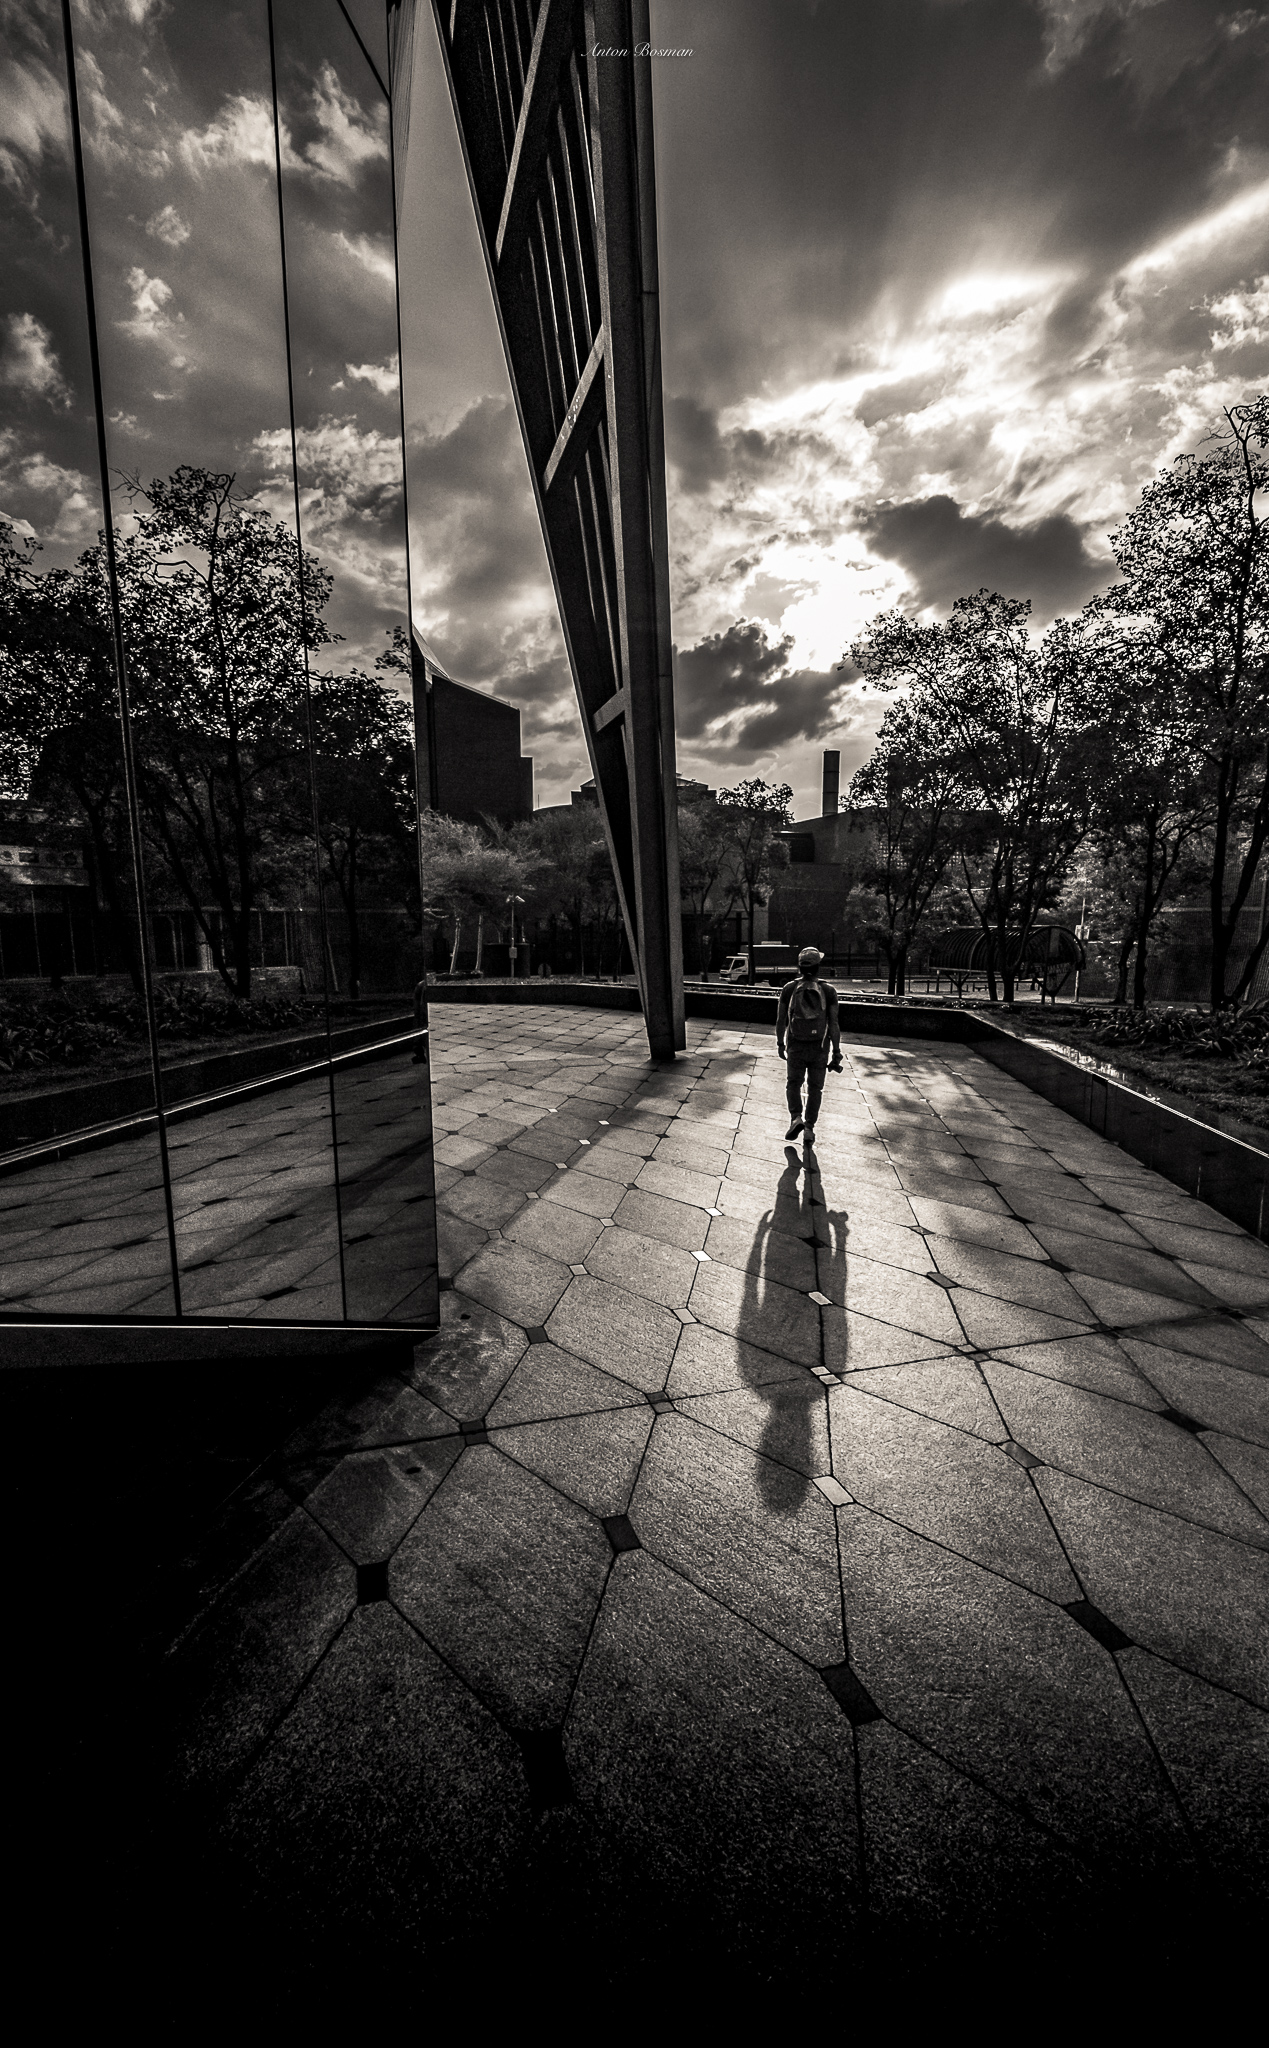
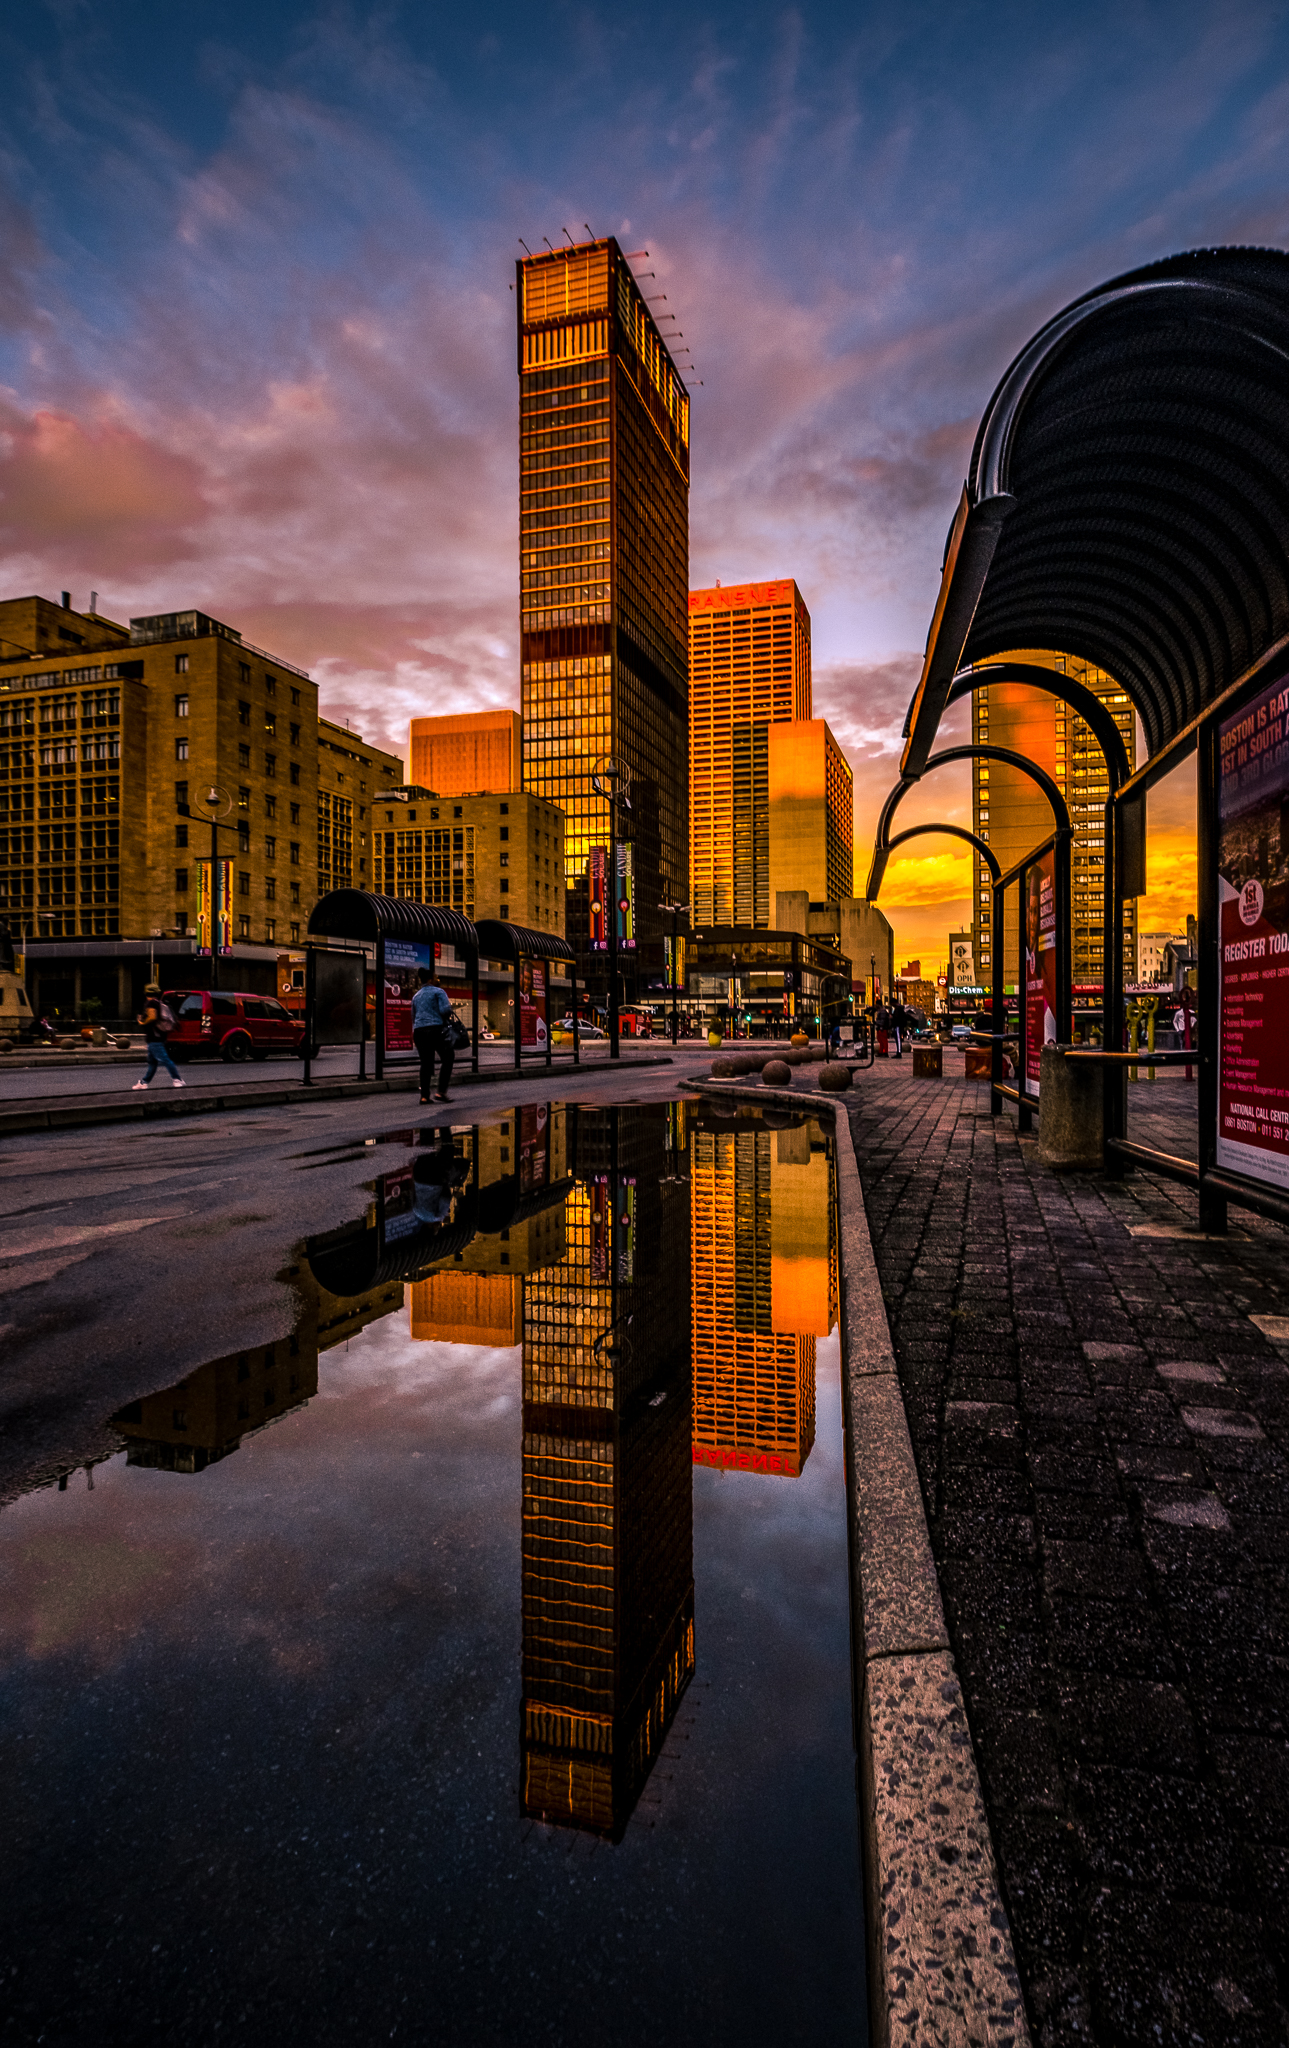
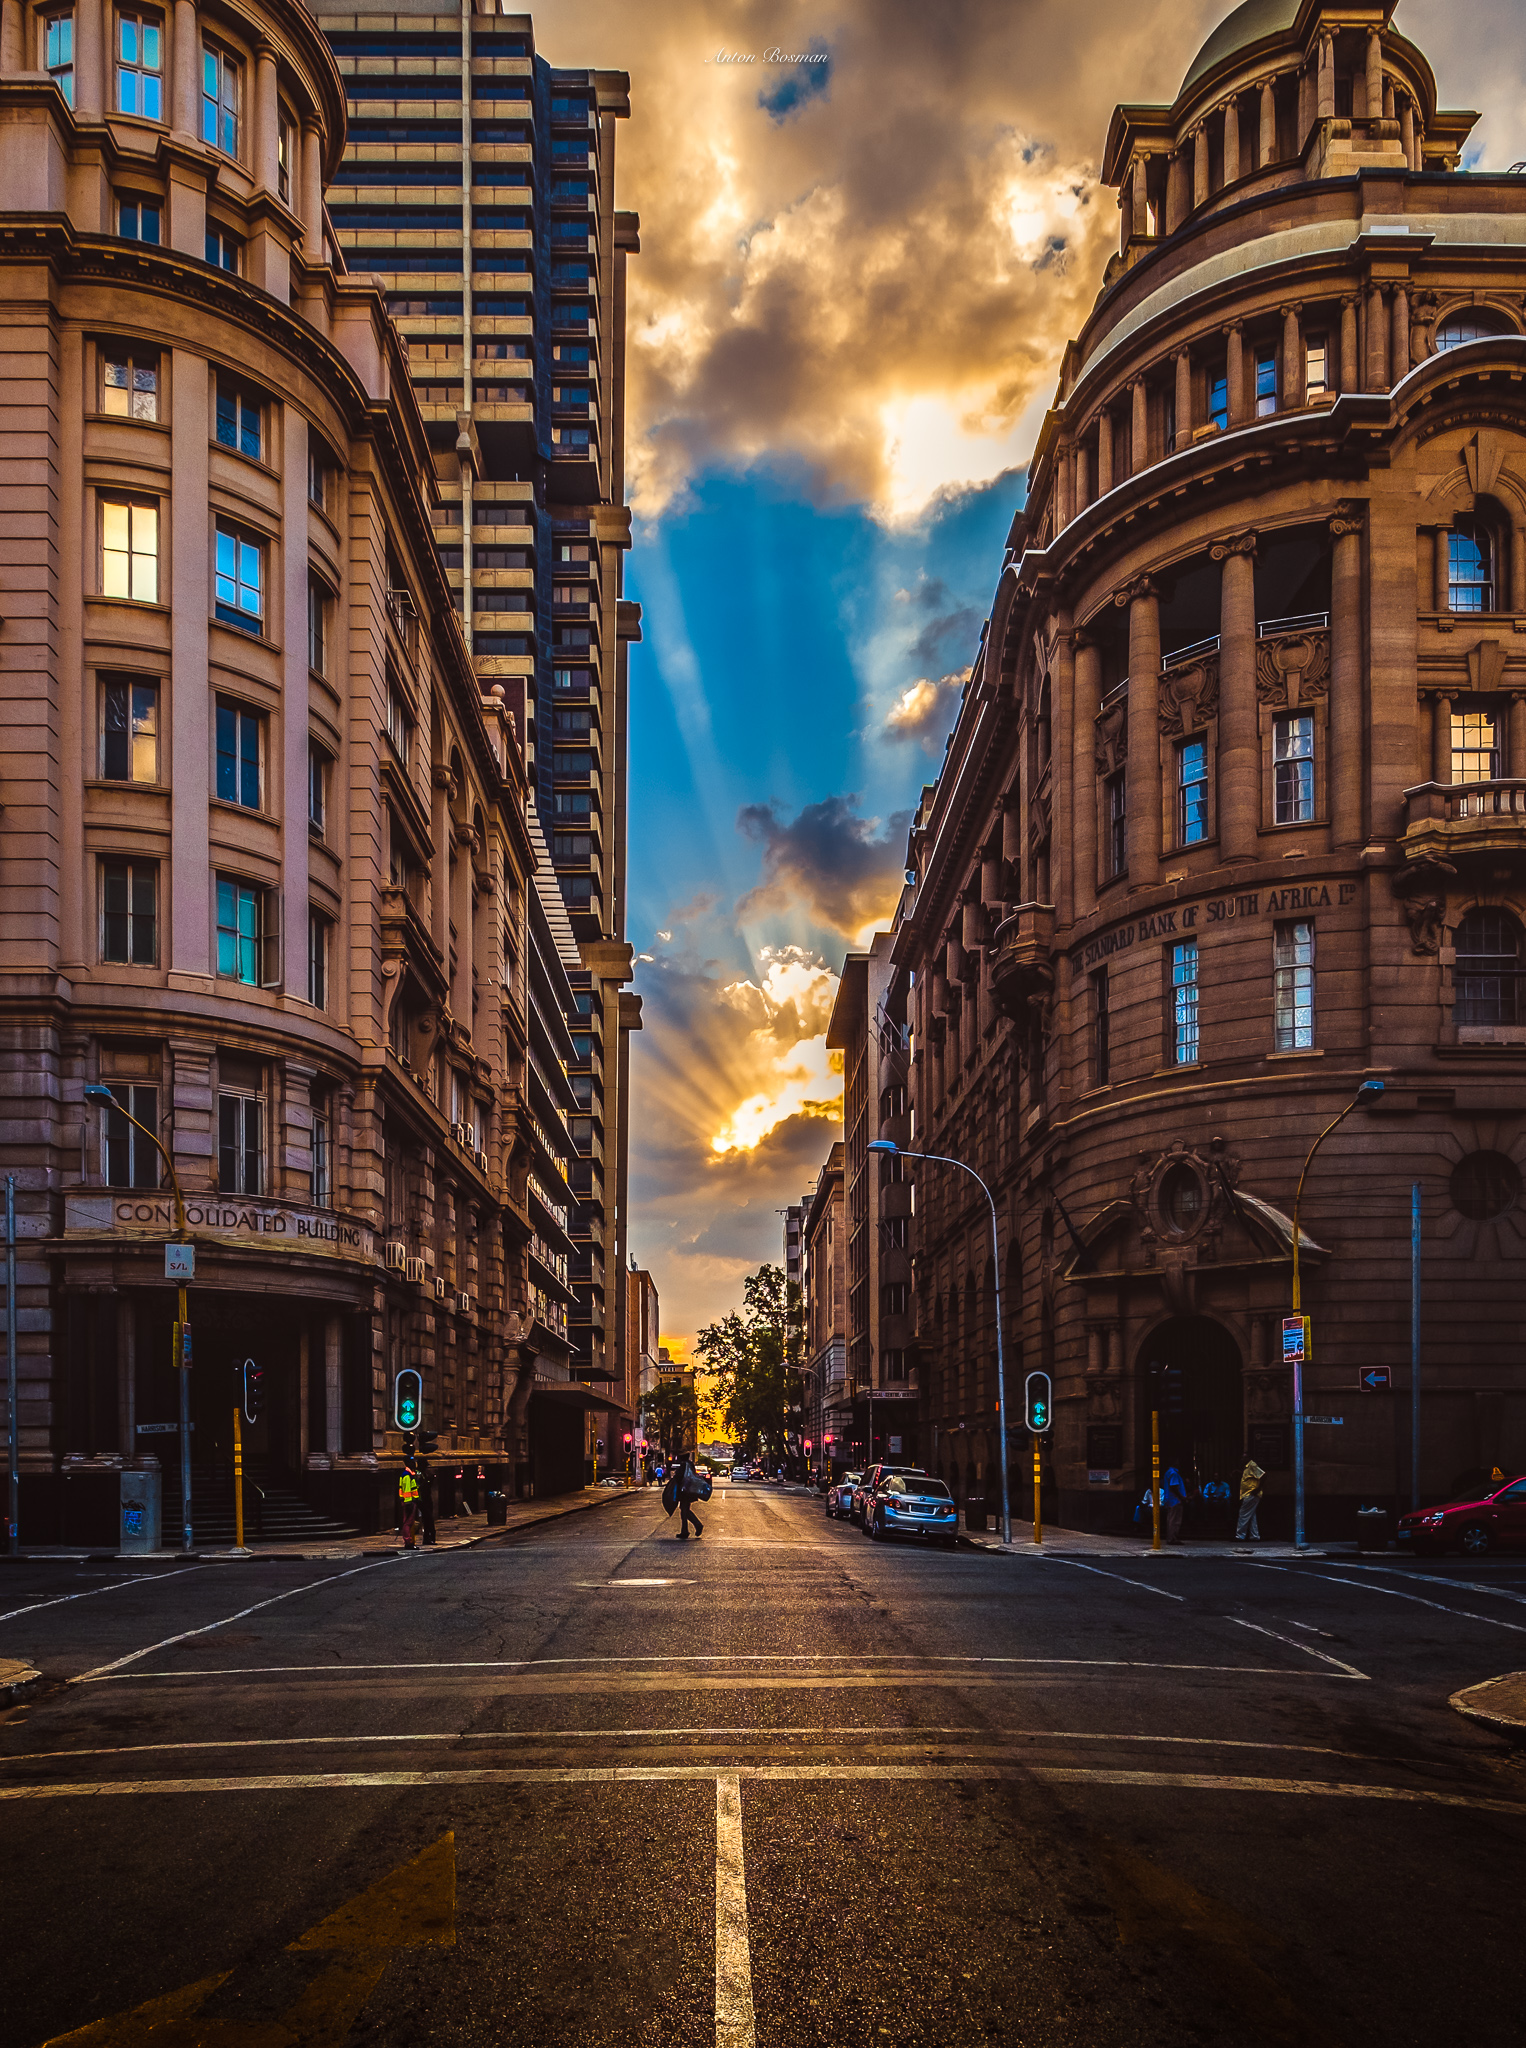
Leading lines are critically important in creating an inner city scape that has visual impact. Light, as much as we use it as a cliché in the world of photography is another major factor. Creating depth and a third dimension using strong leading lines along with light, utilising all the shadows and highlights available to us takes an image from a 2-dimensional view, and presents us with a 3-dimensional view.
I always advocate that photographers learn the basic rules of composition such as the rule of thirds, leading lines, filling the frame and depth of field. Once we know and understand these basic rules, we then become free to explore and expand our creativity.
What thought process informs your decision to edit an urban image as colour, or as black and white?
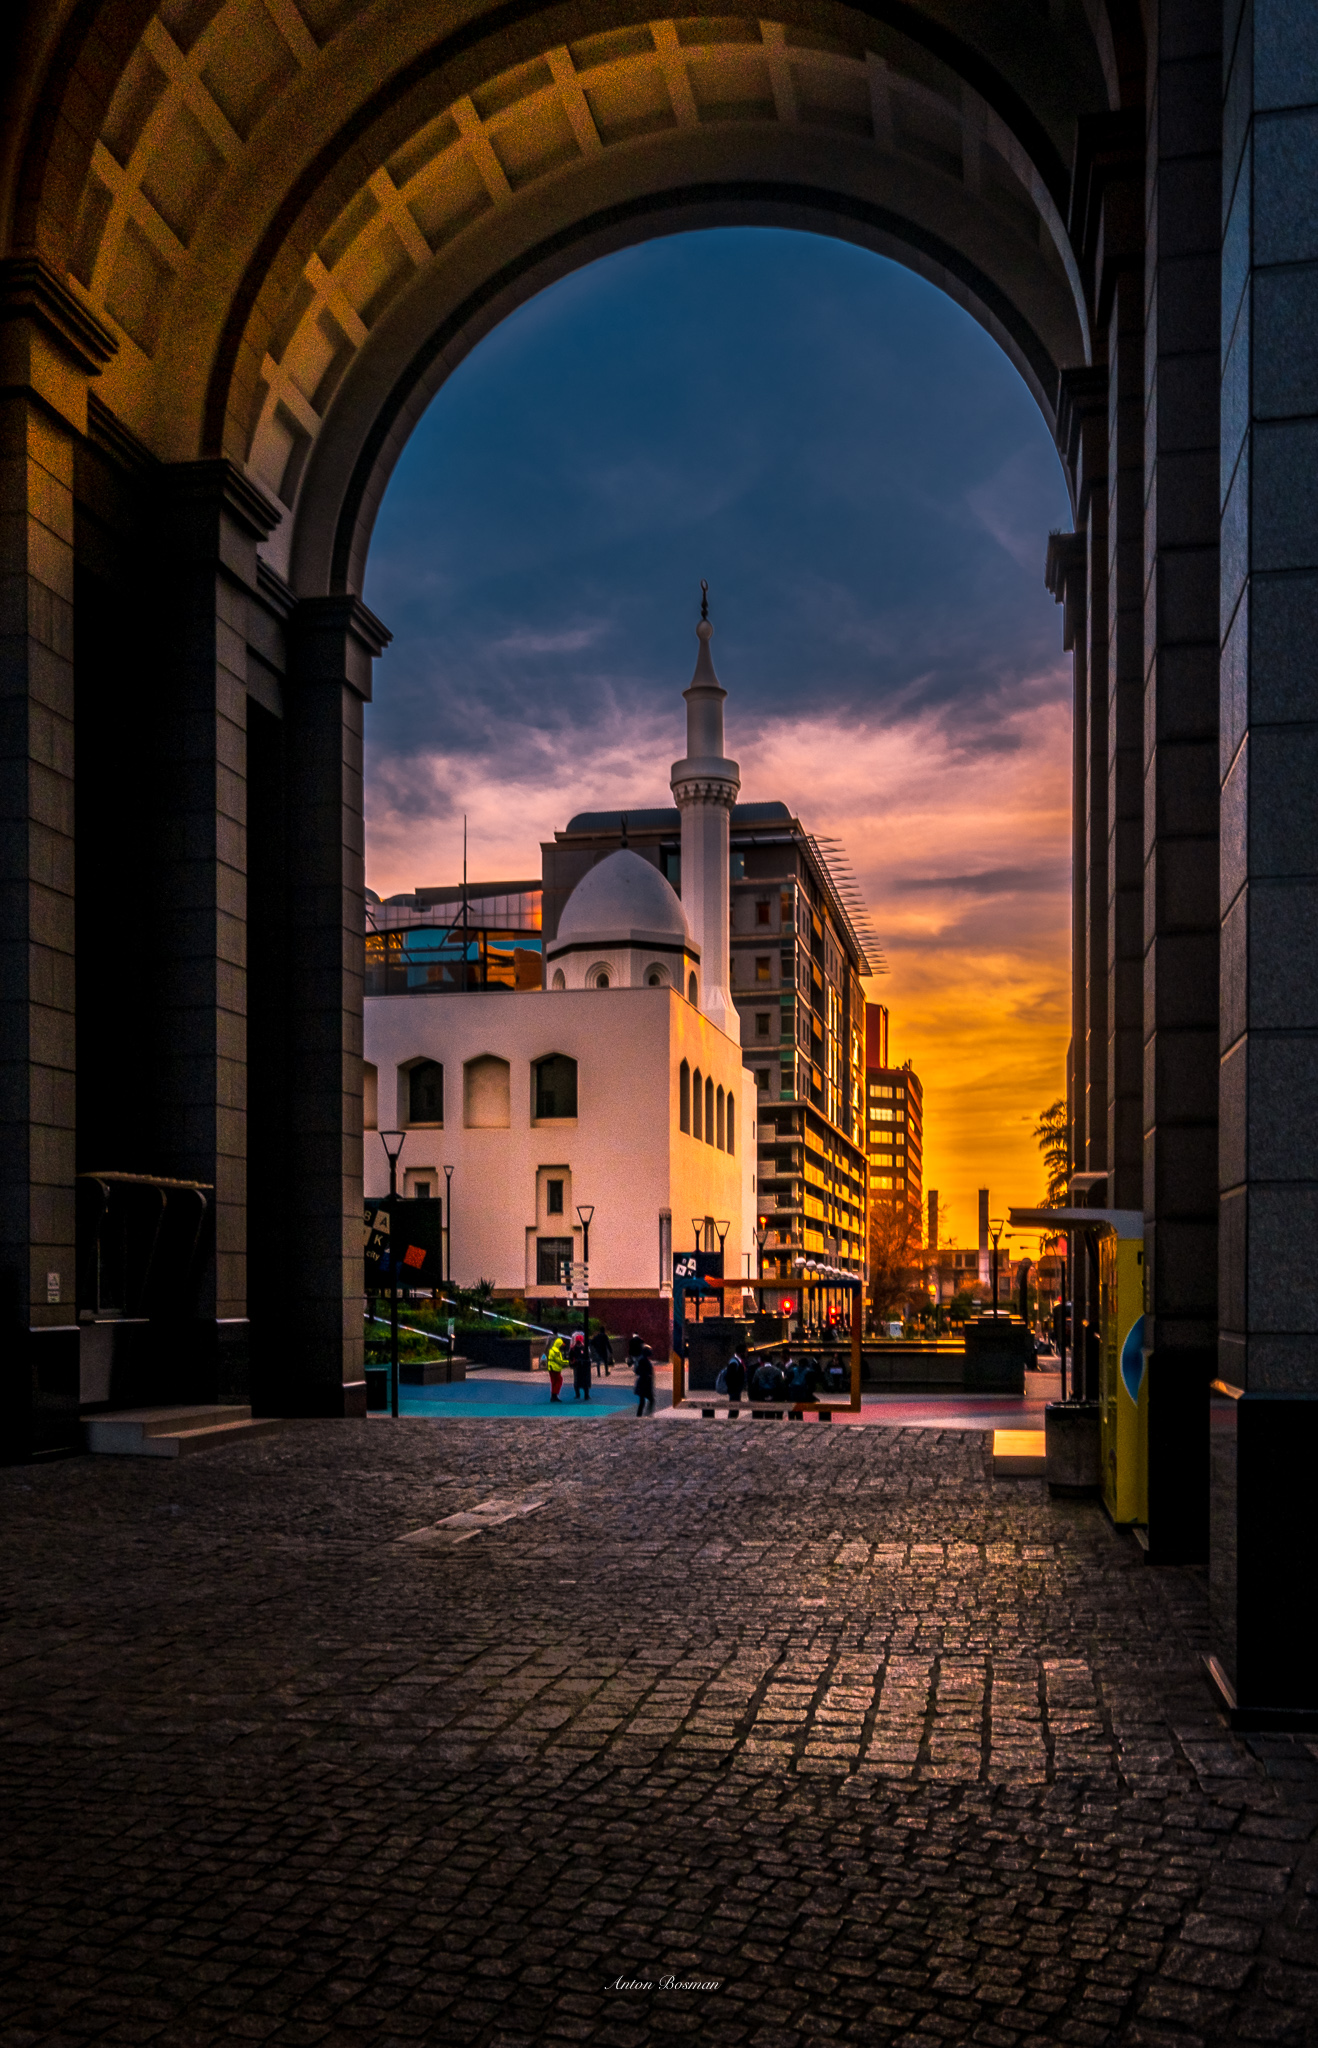
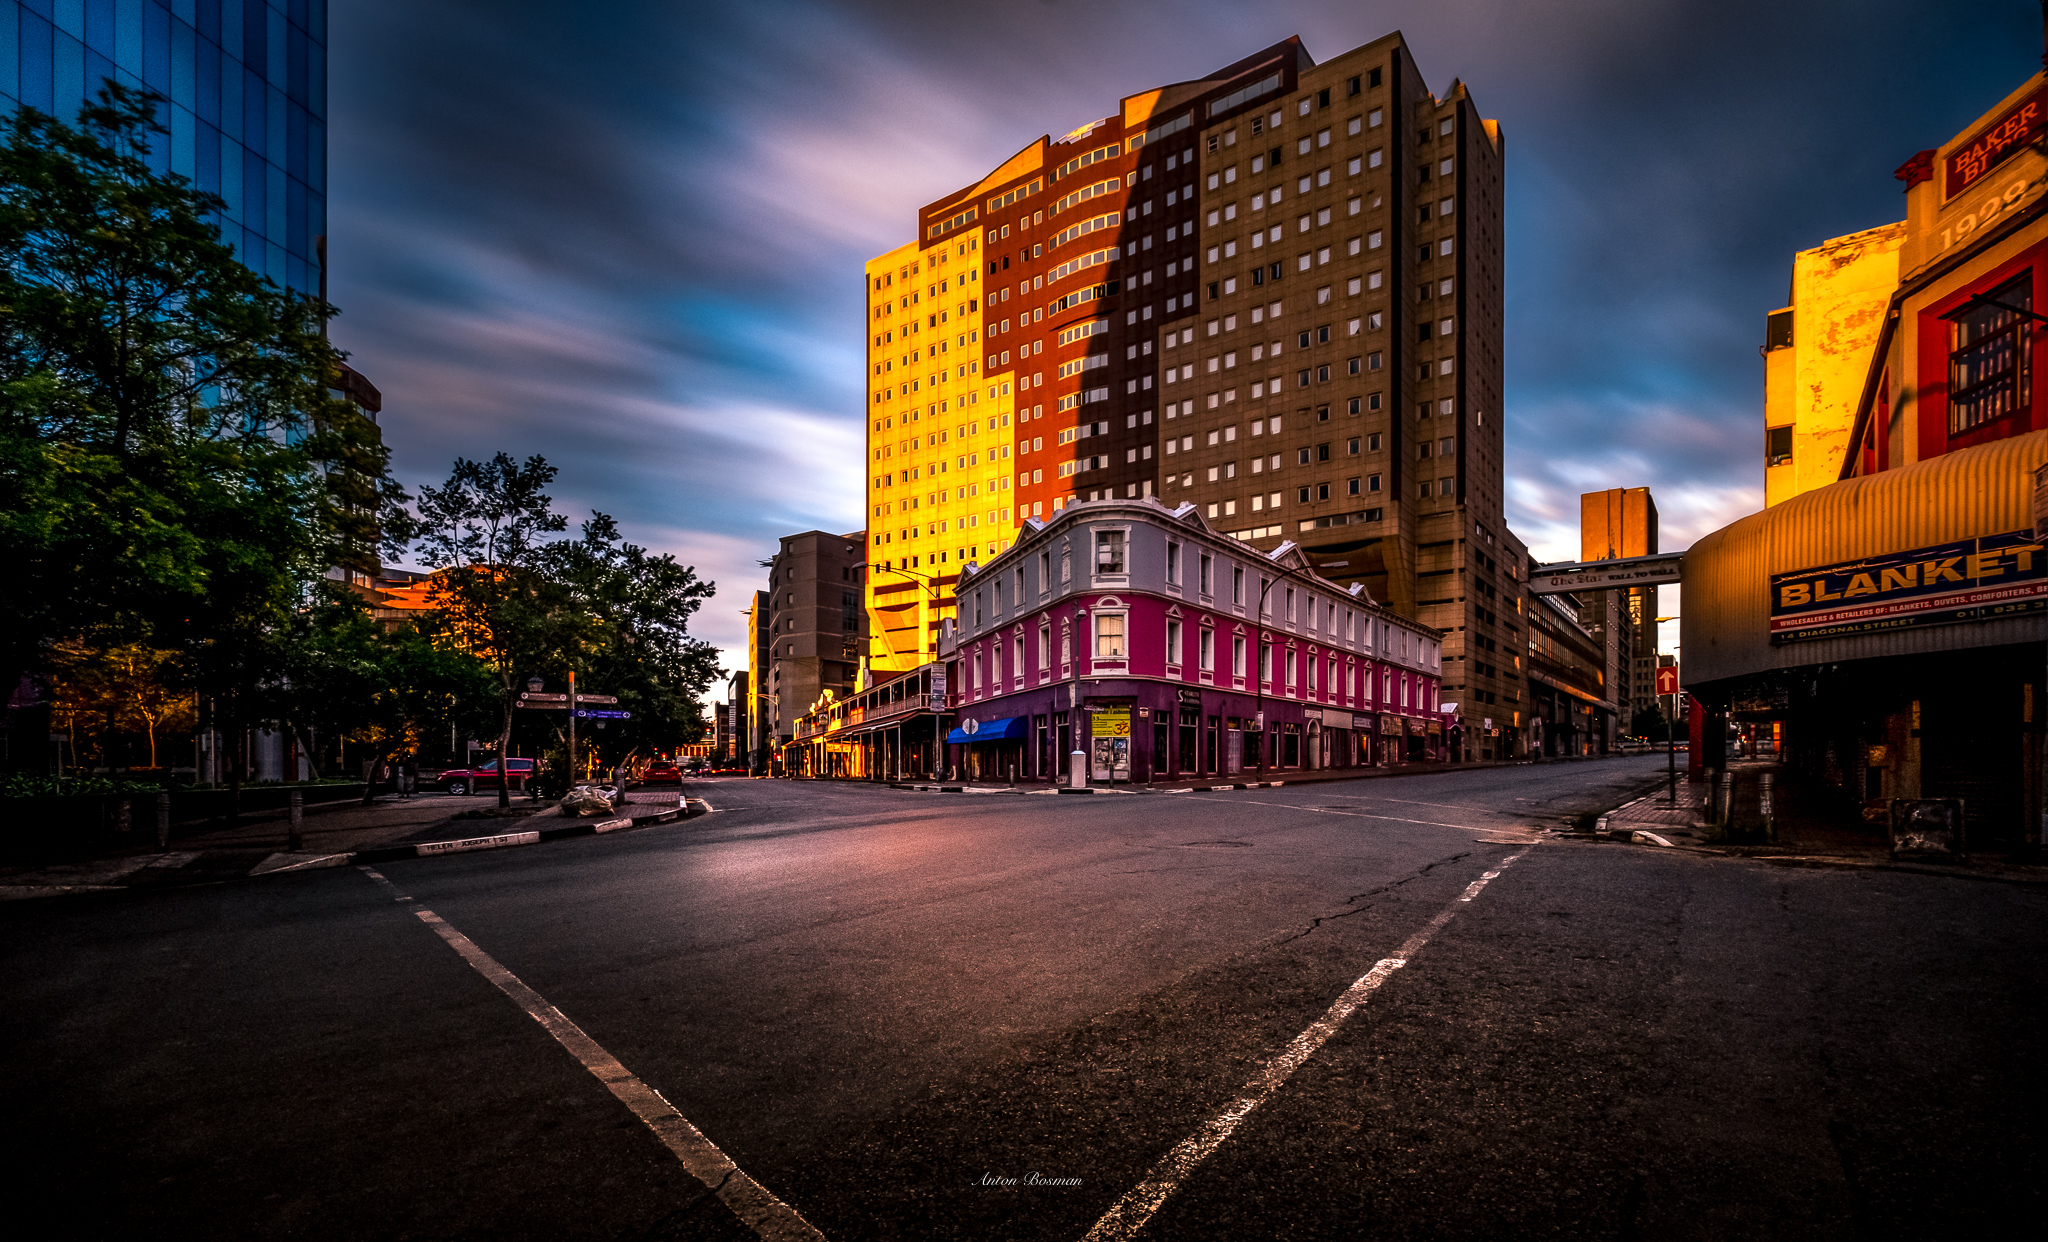
I often prefer colour for urban images. Shooting a lot of these scenes, one becomes quite aware of how visually strong colour can impact the final presentation.
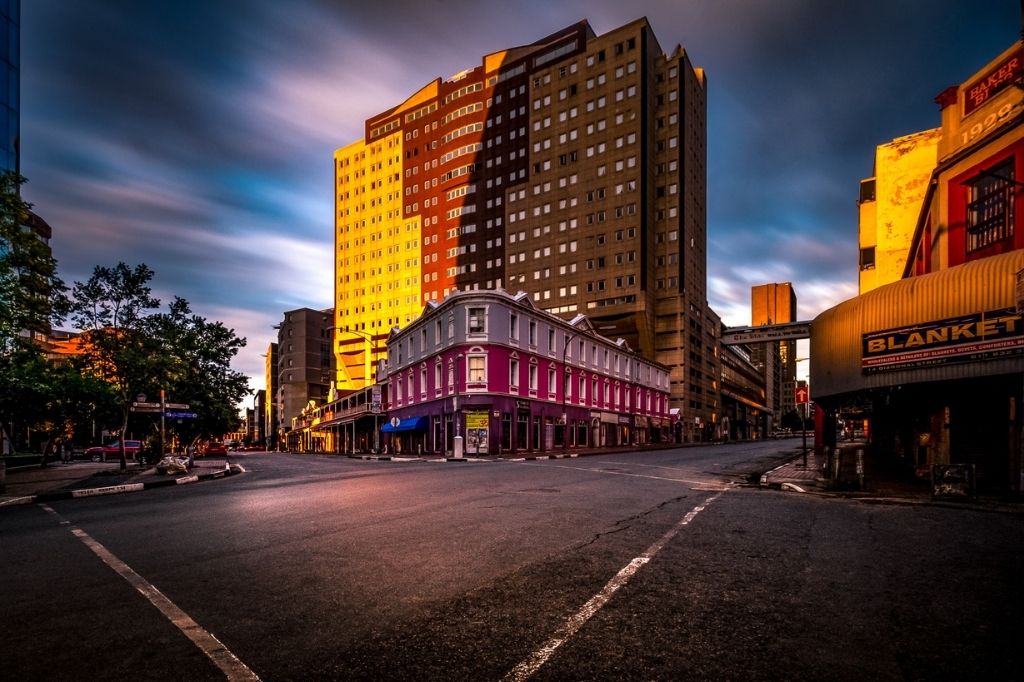
My favourite time to shoot is at the golden hour, and mostly at sunset. The reason for this is that the golden glow lingers around much longer than at sunrise. This often allows for long exposures with cloudy skies, allowing the photographer to capture all the colour in the sky available for the period of time the shutter stays open.
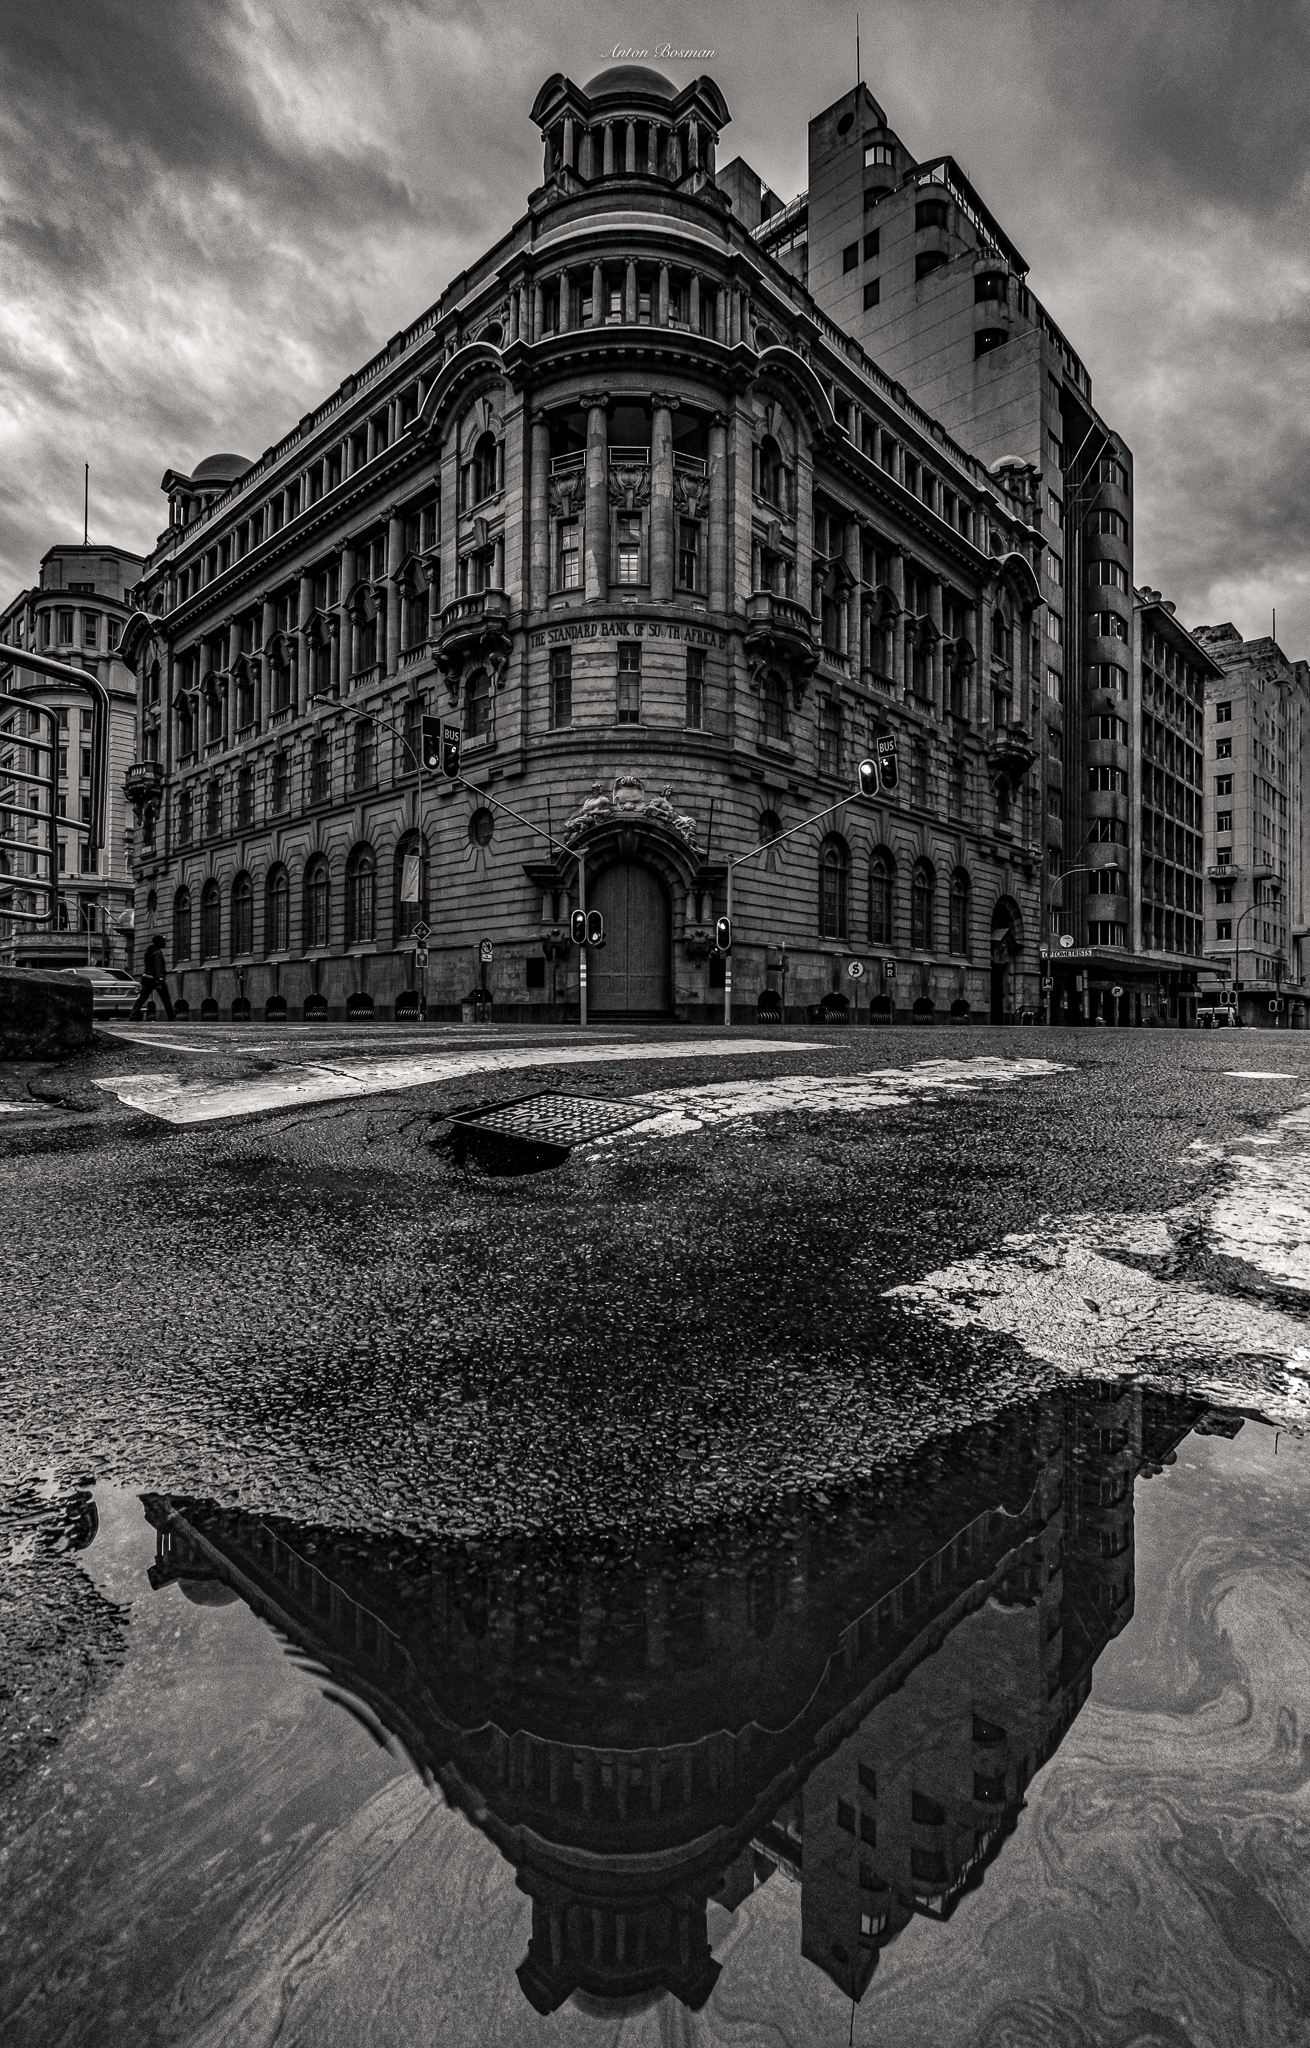
I decide to do black and white when the scene lends itself to do so. The thought process behind this is normally according to feel, and once I get the feel that the scene would make a good black and white, I then try and visualise what it would look like in print. Clear skies, in an urban setting with shadows cast from surrounding buildings normally lend themselves well to a black and white process.

What are your top 5 urban photography tips for crafting an eye-catching image?
- Never spray and pray. Always study the scene. Walk around looking for the best position to be in to create the most striking compositions. Take time and shoot with intent, taking an image just for the sake of taking the shot, often looks that way in the final presentation.
- Light, light, light. Midday is normally the most difficult and uninspiring time of the day to shoot. The sky is always harsh; there is a lack of contrast and separation which one gets from shadows. Be patient till the light is exactly what you envision.
- Shoot to edit. Pointing a wide-angle lens at tall structures leads to a distorted view. It can often be seen as “creative”, but the human eye and our brain is accustomed to seeing verticals as straight as possible. Shoot wide around your subject with the aim to correct the verticals in post. Envision the effect that you want to achieve, and expose to give you latitude in post, such as adjusting saturation and exposure to our preferred taste and again achieving the desired end result.
- Become your own individual self. Spend ample time working on your images in post production. Try new things. Work at achieving a look that becomes distinctly you, a look that is immediately recognisable to your audience as your work. Never be a “copycat” — draw inspiration, but never copy.
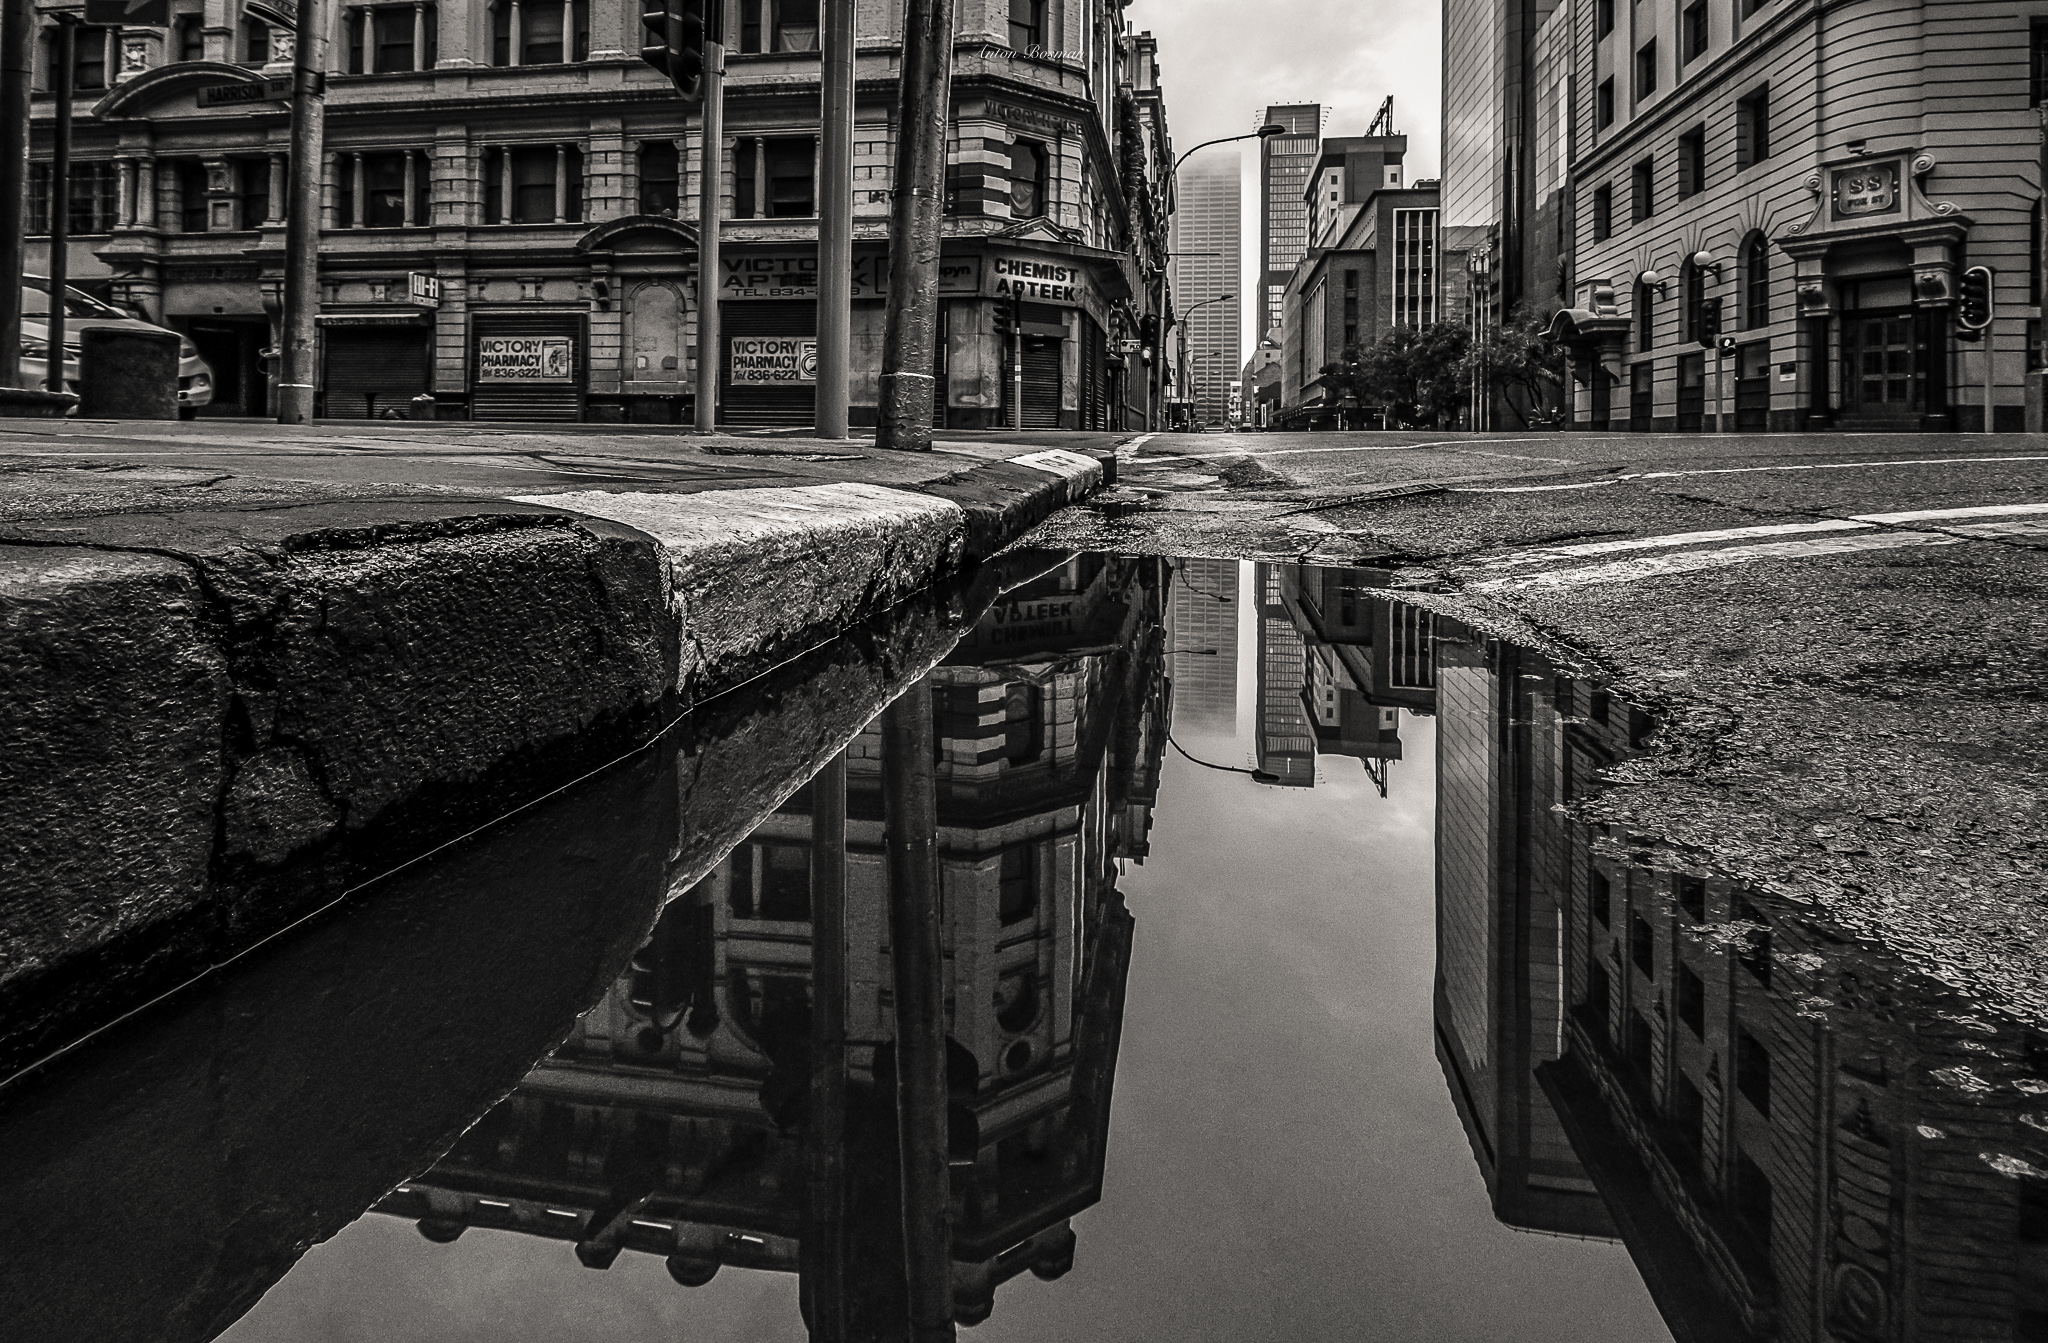
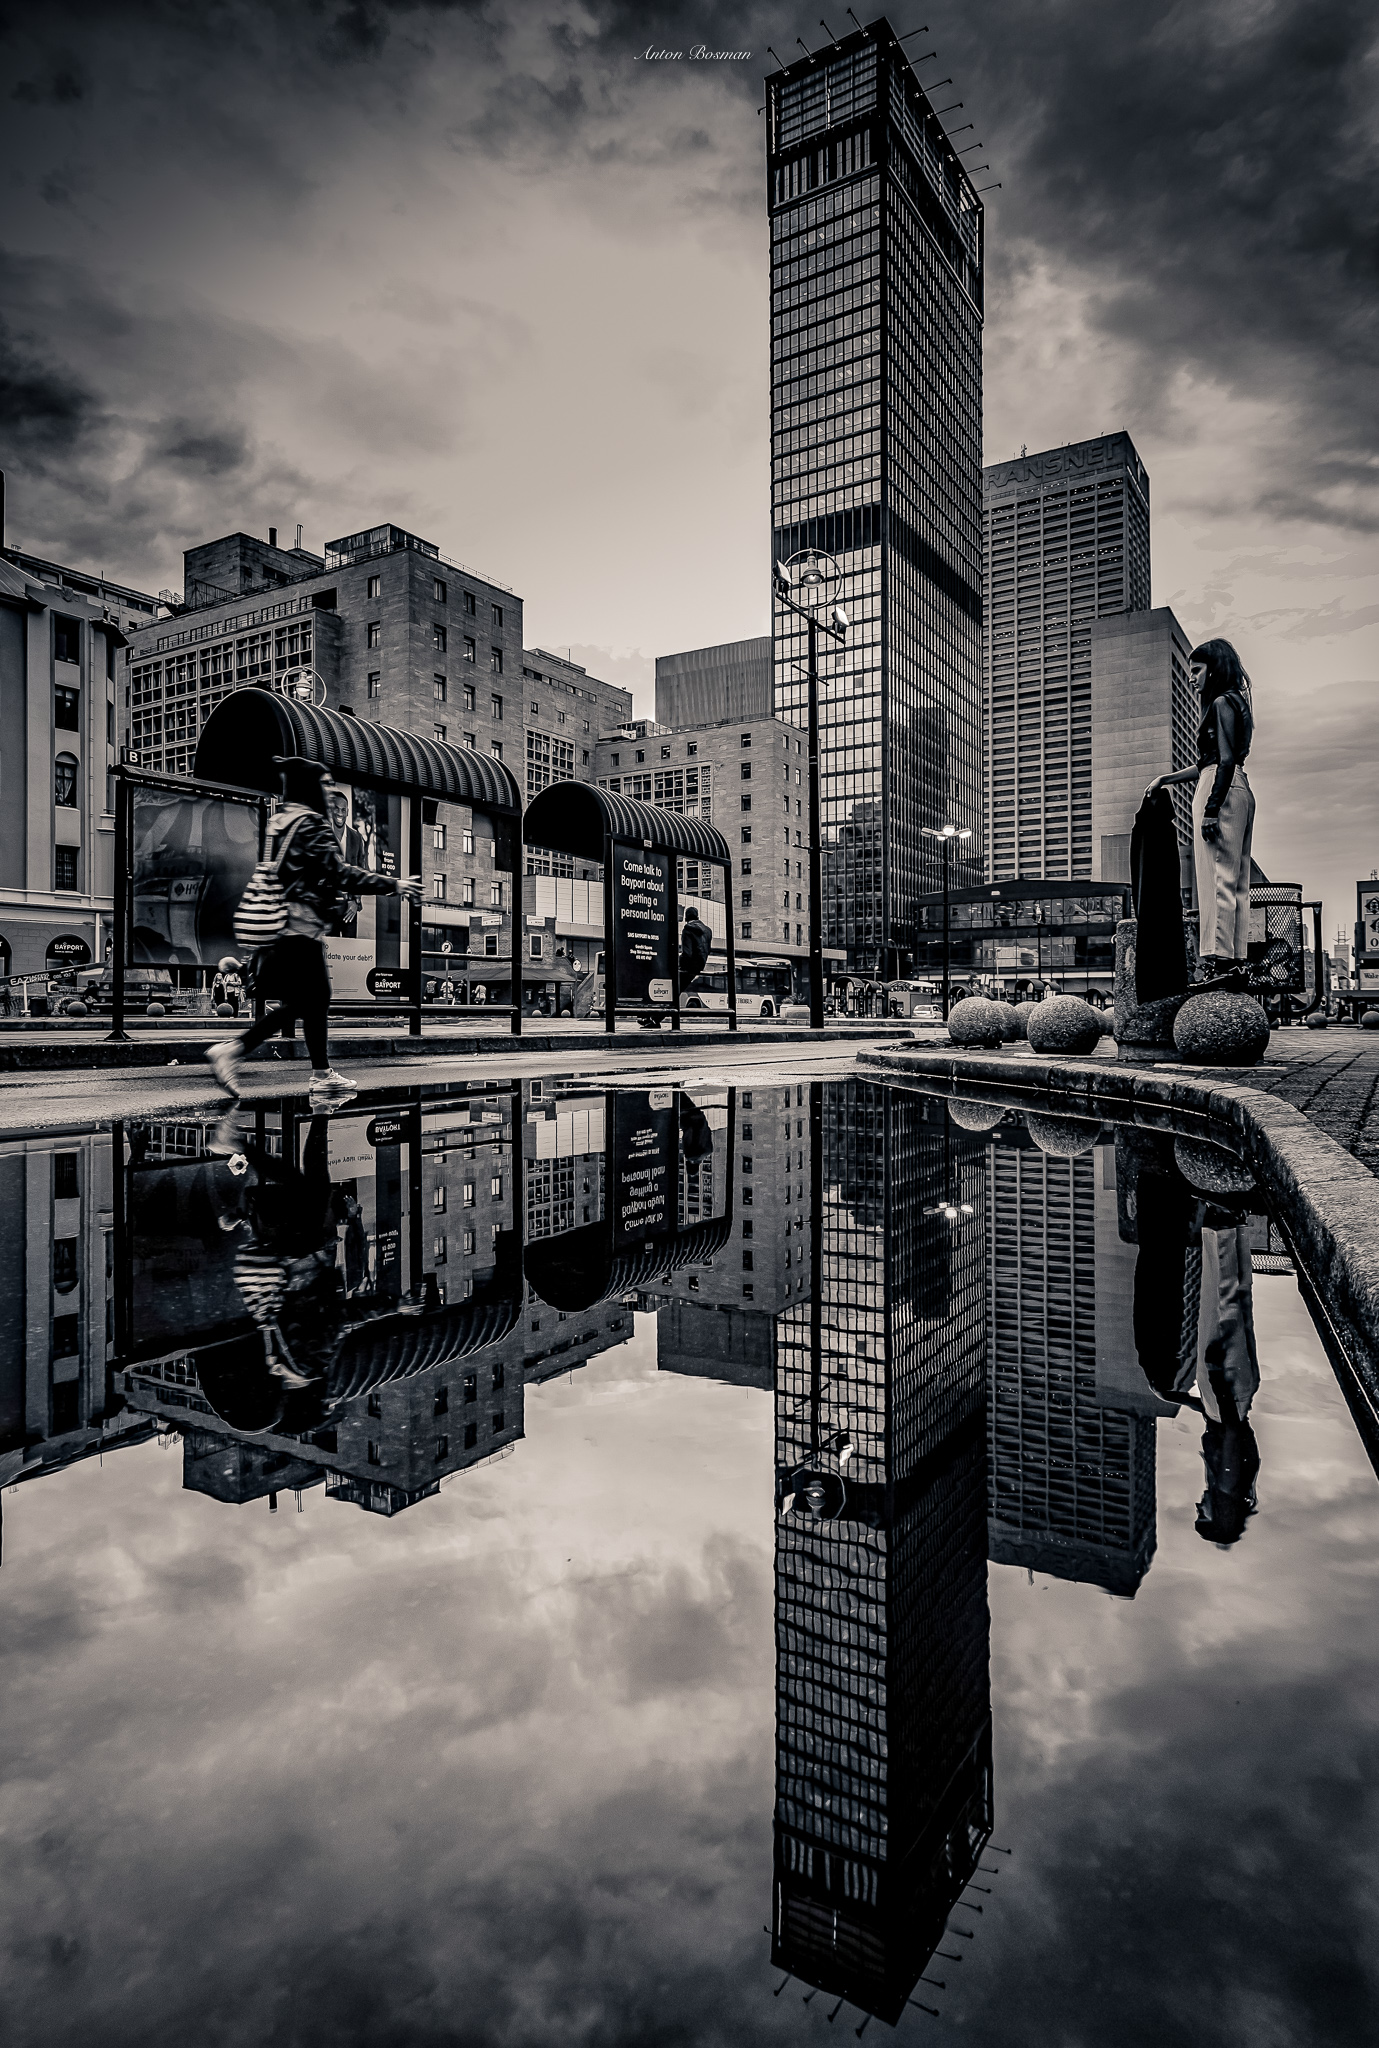
- Use all the elements available to you. With urban photography we are fortunate to have reflections from surrounding buildings. Use these to create eye-catching compositions. Puddles are great for reflections. Street signs, vehicles, painted road signs, derelict buildings, the presence of people, light poles, etc. All these elements are variable to create something visually strong.

Put together your perfect kit for shooting urban photography. What’s going in your gear bag and why?
The perfect kit for me is a very basic kit. I have with me most of the time, two Fujifilm bodies. Currently I carry with me two X-T3 bodies. One body has my 10-24mm lens (the absolute best lens I have ever owned) and a tripod bracket. My second body has the Fujifilm 55-200mm lens on. I use this lens for long images, where I want to create a perspective that makes the viewer feel like there is a journey. The 55-200mm also helps me to isolate a subject when shooting from rooftops, I also have a Punks Billy Carbon Fibre tripod, a remote trigger, and Haida 10-, 6- and 4-stop ND filters. Lastly, a NiSi night filter, to balance out the yellow light creating a more neutral white balance when shooting at night.